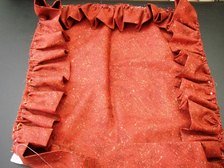
Making Frilled Cushions
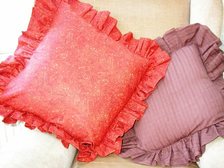
Making frilled cushions can change your room into a country cottage look or given a feminine touch.
The frill can be single, double, two different colours or one longer than the other.
Steps to making frilled cushions
- Decide what size your cushion will be and then cut the cushion front and back out of the material.
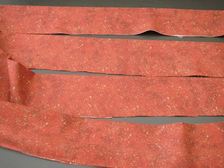
You will also need enough strips to make the frill. The material for
the frill should be able to go around the cushion at least twice or
three times. This will depend on how frilly you want it to be.
- The frill sections need to be sewn together to make one long piece of material. If you have been able to cut this out already in one length then please miss this step out. Join the strips with right sides together and sew to make a complete piece. Fold this in half along the length so it is now half the width.
- Fold the frill into four sections. This will give the amount of frill
for each side on the cushion. To help when pinning the frill onto the
cushion front mark each of the folds with a coloured stitch or cut out a
notch.
- Using tacking stitches sew along the raw edge of the frill to get it
ready for gathering up. Another way of gathering is to sew a zig-zag
stitch over a thin cord, as the cord is pulled the material ruffles up.
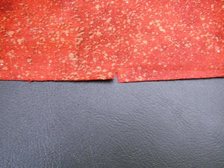
- Take the front cushion piece and pin the frill to the right side, of the fabric, matching the markings to each corner.
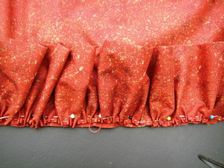
- Pull up the tacking stitches or cord to gather the frill so it will fit each side of the cushion. Make sure the gathers are evenly spaced.
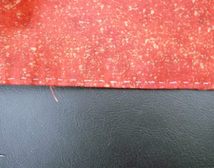
- Machine stitch the frill to the cushion front within the seam allowance to hold the frill in place.
- With right sides together place the cushion back over the cushion front keeping the frill in between both pieces.
- Sew the cushion front and back together using 1/2 inch (1.5cms) seam allowance remembering to leave a gap for the fastening.
- Turn cushion cover right sides out.
Fastenings
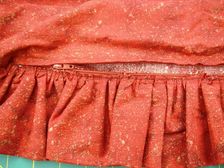
After you have completed making frilled cushions inserting a zip in the seam can be a little difficult, due to so many raw edges, although it can be done.
When I made the cushion shown above, I finished off the opening side with a zig-zag stitch catching in all the edges from the frill and the cushion. This made it easier to attach the zip to.
Another way to use the fastenings would to be put it in the middle of the cushion back. The back piece of the cushion would be cut out in two halves, allowing for the seam allowance. The fastening then sewn in place. The seams around the edges could then be sewn completely. Alternatively the cushion could be closed using no fastenings at all and just slip stitched closed after the pad had been inserted.
Return from Making frilled cushions to Sewing Instructions
Affiliate offers
Please take care with any soft furnishing that it does not come into contact with any heat source.
If you have found an error on this page or want some more information on sewing cushions.
Please contact me . Thank you
Cushions and more participates in affiliate advertising and receives a small payment from these adverts.
I now have a few items available in my Etsy shop.
Cushions Galore Newsletter
Recent Articles
-
Hook and loop fastening is great to use in cushion covers.
Apr 26, 25 10:47 AM
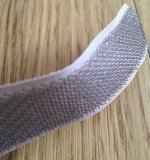 Another versatile fastening is Velcro which is a hook and loop fastening and can be used in place of zips.
 -
Knitting for babies is such a lovely thing to do.
Apr 26, 25 10:42 AM
 What could be more special to give a newborn than some handmade knitting for babies.
 -
Making decorative cushions turns the plain into interesting.
Apr 26, 25 10:39 AM
Cushions come in all shapes, sizes and look. Making decorative cushions isn't too hard.
New! Comments
Have your say about what you just read! Leave me a comment in the box below.