How to make Facemasks
Learning how to make facemasks to wear when going into shops or onto public transport will ensure that you have enough to wear and then wash afterwards
Facemasks have been used in many countries for a long time and now with the Coronavirus Outbreak of 2020 we are all urged to wear them when travelling on public transport and since July 24th in shops also.
The government website gives instructions on how to make straightforward ones that tie at the back.
**The facemasks being shown here are fabric face coverings. These can be worn, washed and used again but are not of medical grade and are not professed to be anything but a simple barrier between the mouth, nose and the atmosphere.**
Steps in How to make Facemasks
There are so many different styles of facemasks and everybody has a different shape of face, head, jawline etc. It can be difficult to get a seal around the nose and mouth area without gaping. If the mask is too big it will slip up and down and getting a snug fit is the aim when using a facemark.
The facemask needs to be able to cover the nose and mouth area comfortably so not to inhibit breathing and talking. These are either gathered in pleats or contoured around this area.
How to make facemasks - Simple Pleated Tie Back Style
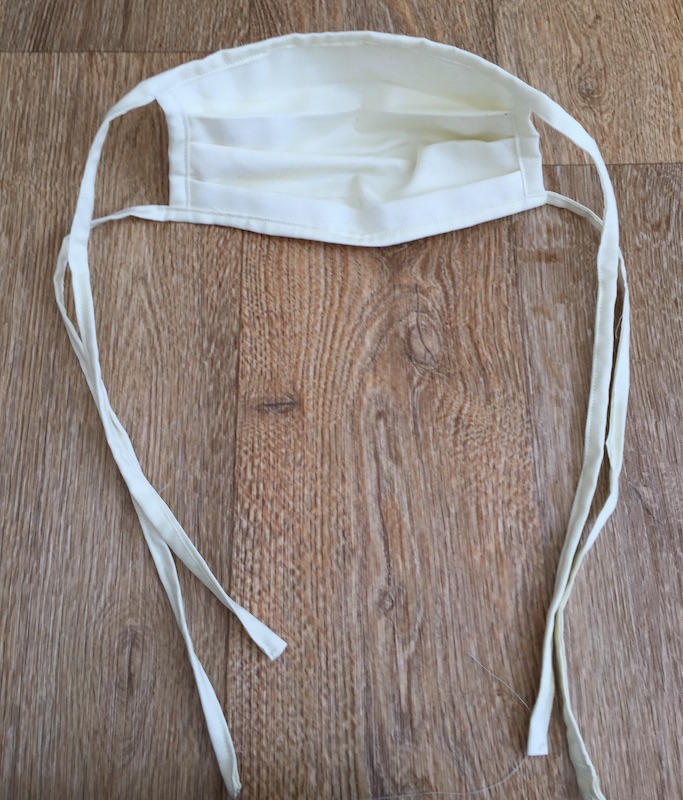
These instructions for how to make facemarks in this style is for guidance and the mask does sew up quite big. The mask should cover from the bridge of your nose to your neck and allow for easy breathing and talking that is why they are pleated to allow for extra fabric around the mouth area.
They can be a single layer but double is probably better and is given in these instructions.
Sizes can be adapted to suit the individual bearing in mind what the mask covers.
When wearing this type of mask make sure the pleats are going downwards so the virus cannot fall into the pleat.
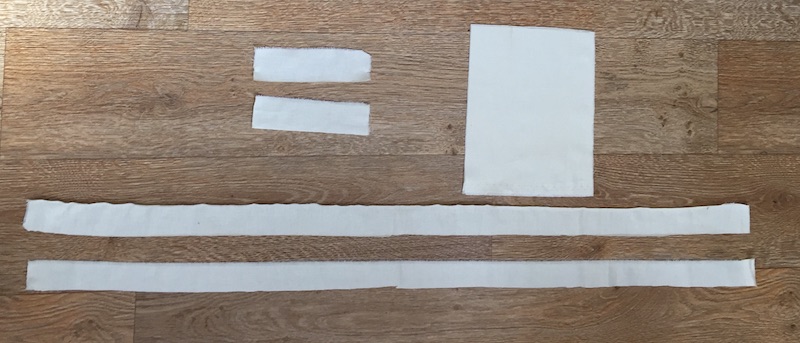
Basically you will need to cut out two rectangles (this one is 9 inches (23 cm) by 7 inches (18 cm). Two smaller lengths approx 1.5 inches (4 cm) by 6 inches (15 cm) and then two larger lengths 1.5 inches (4 cm) by 40 inches (102 cm). From non stretchy finely woven fabric like a cotton or cotton mix.
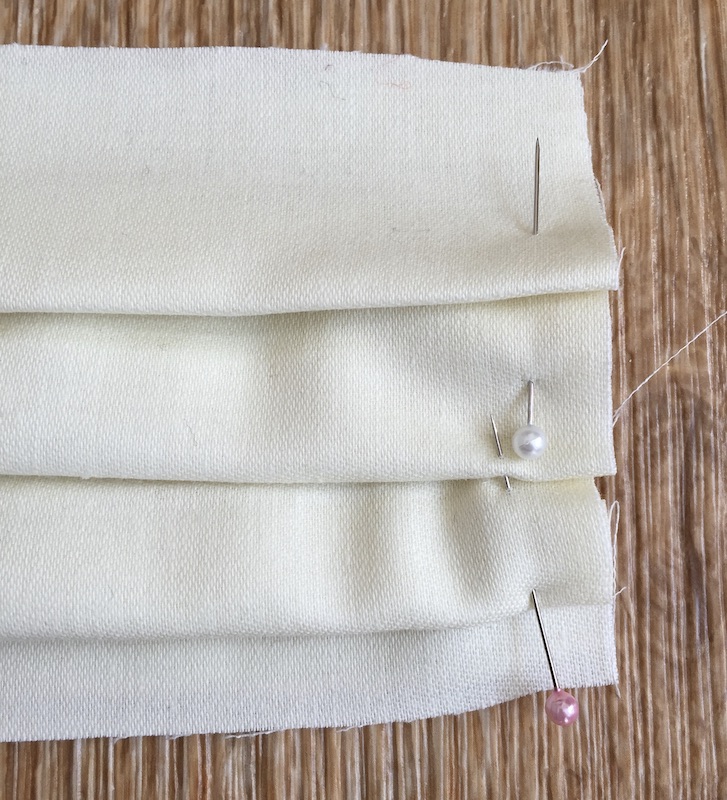
Take the larger rectangles and place then right sides together. You need to make 3 or 4 pleats (depending on your choice and size) at both sides and then pin in place.
To make sure the pleats stay in place it is best to stitch them so they stay folded down.
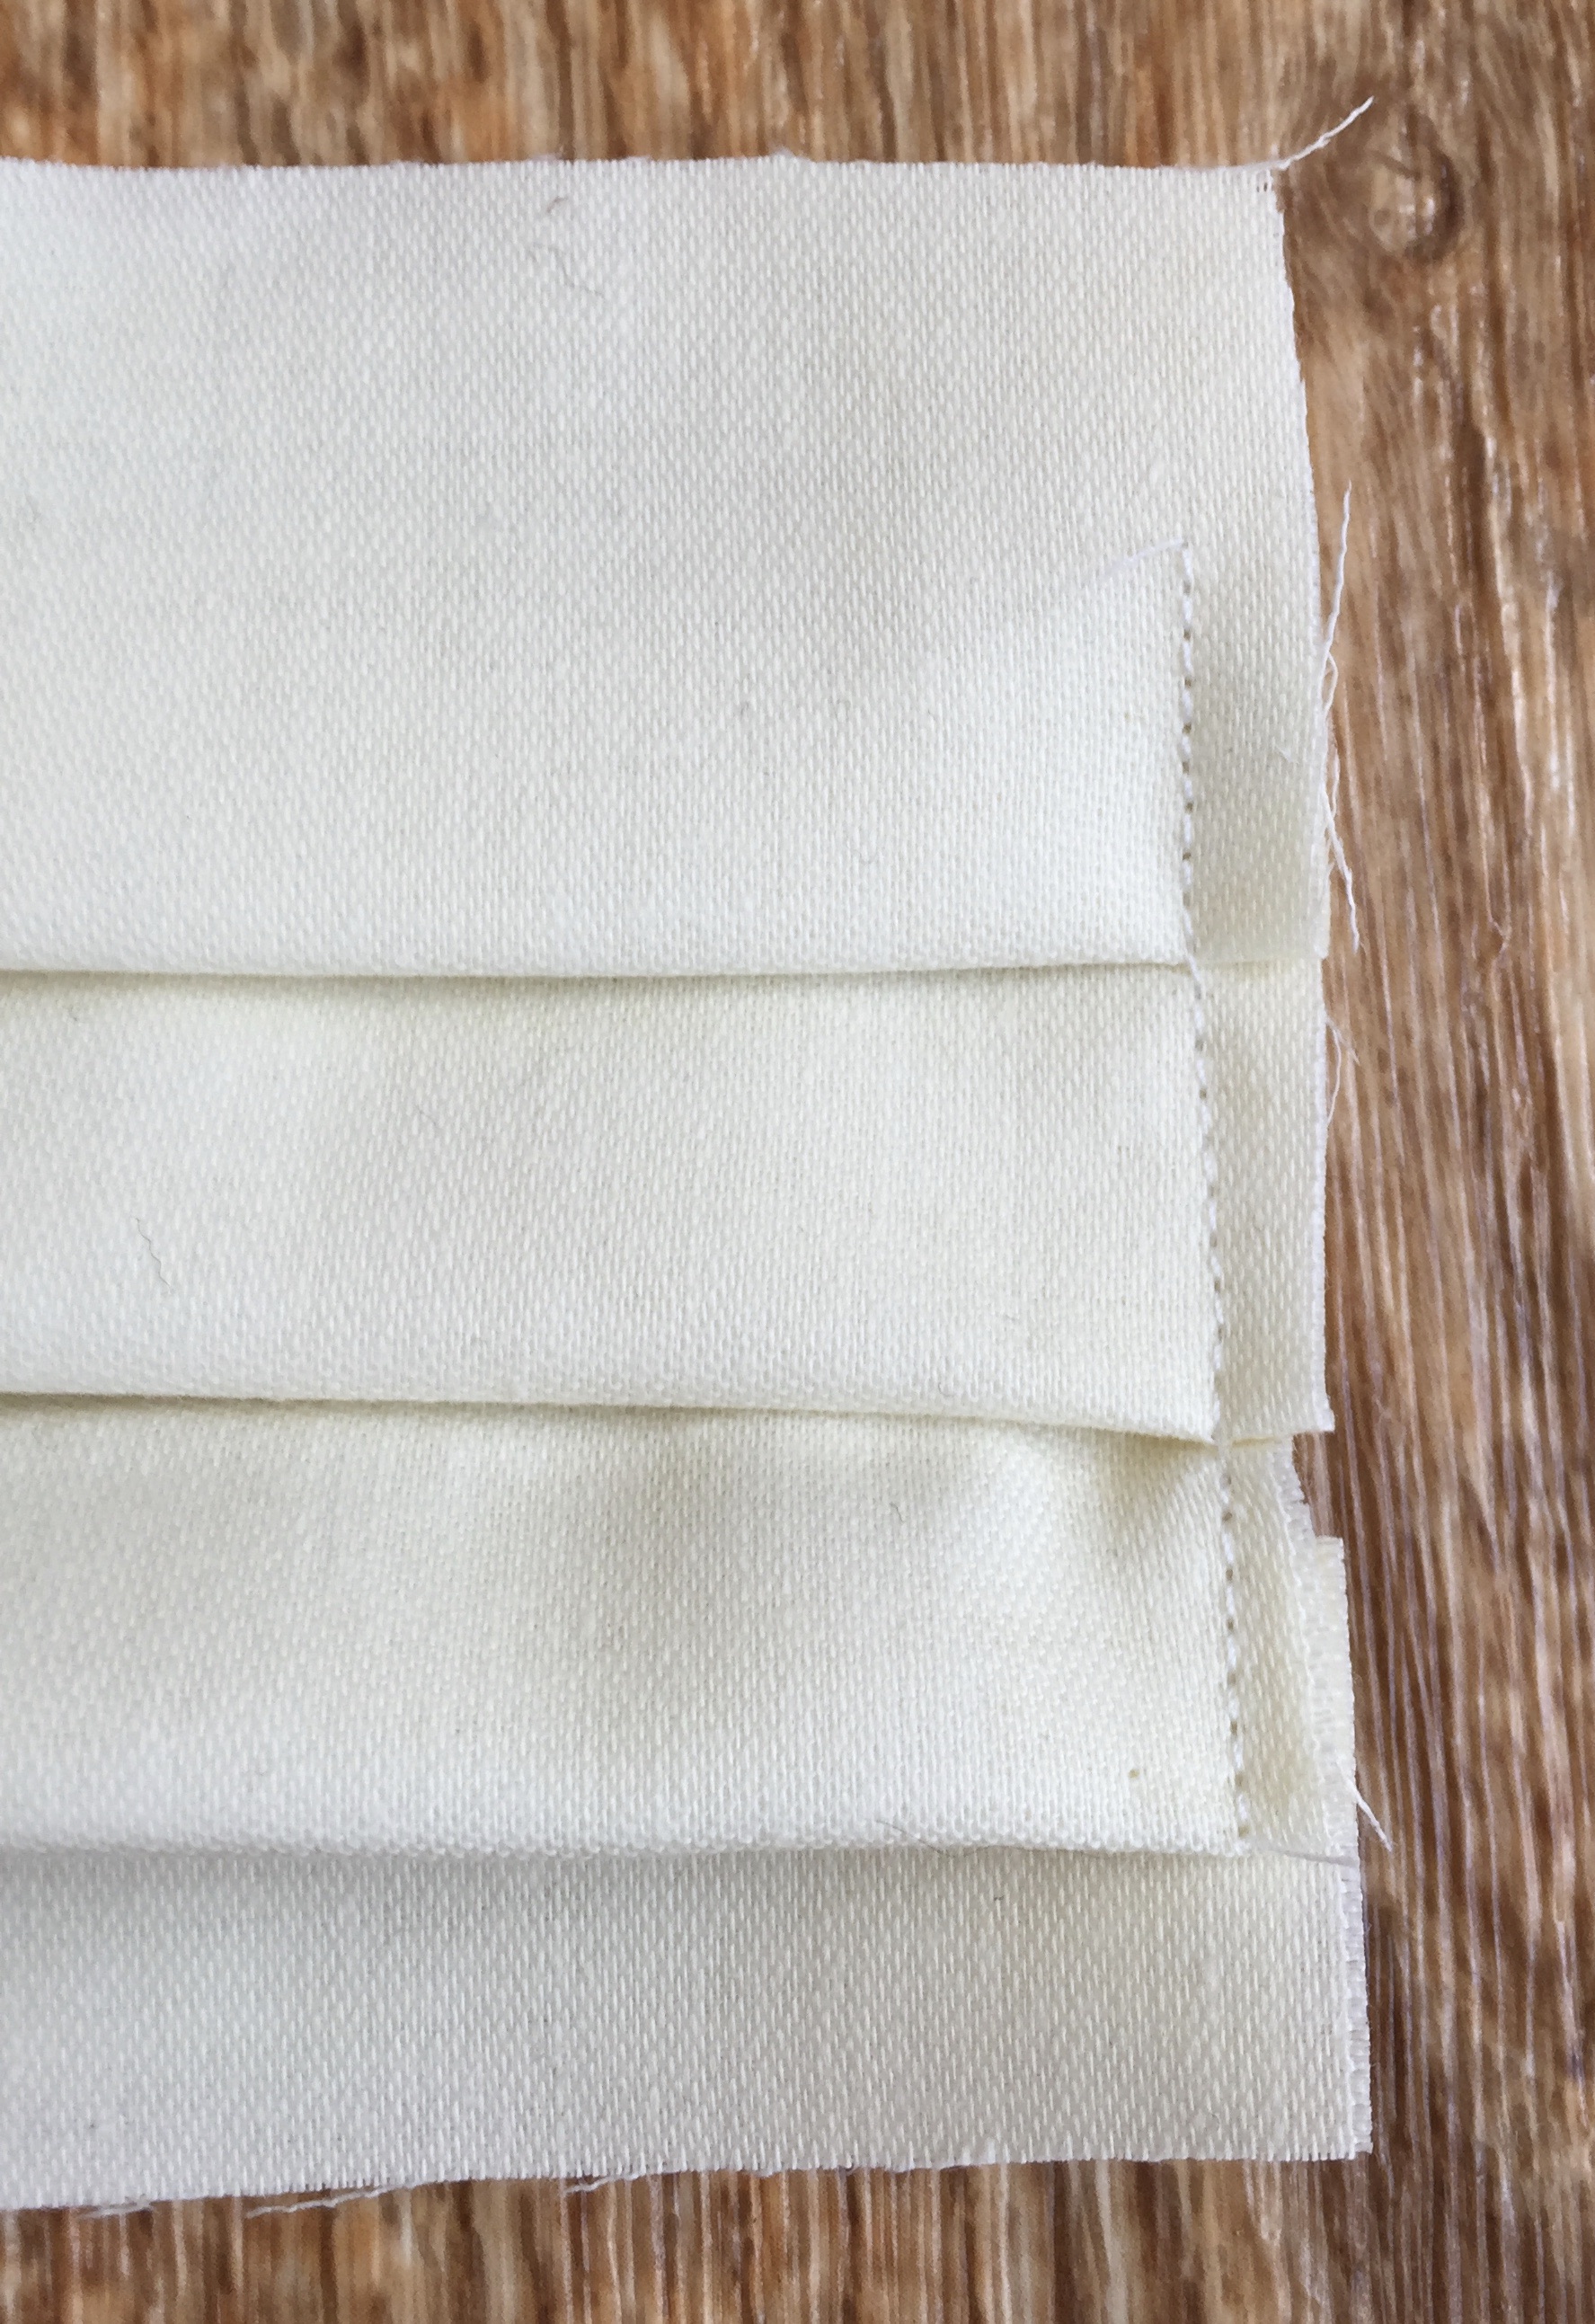
Then sew the side seam so that the stay stitching is within the seam allowance. A good guide is the width of your sewing machine or the standard 5/8 inch (2 cm).
This will give you a smaller rectangle that has the amount of pleats of choice in place.
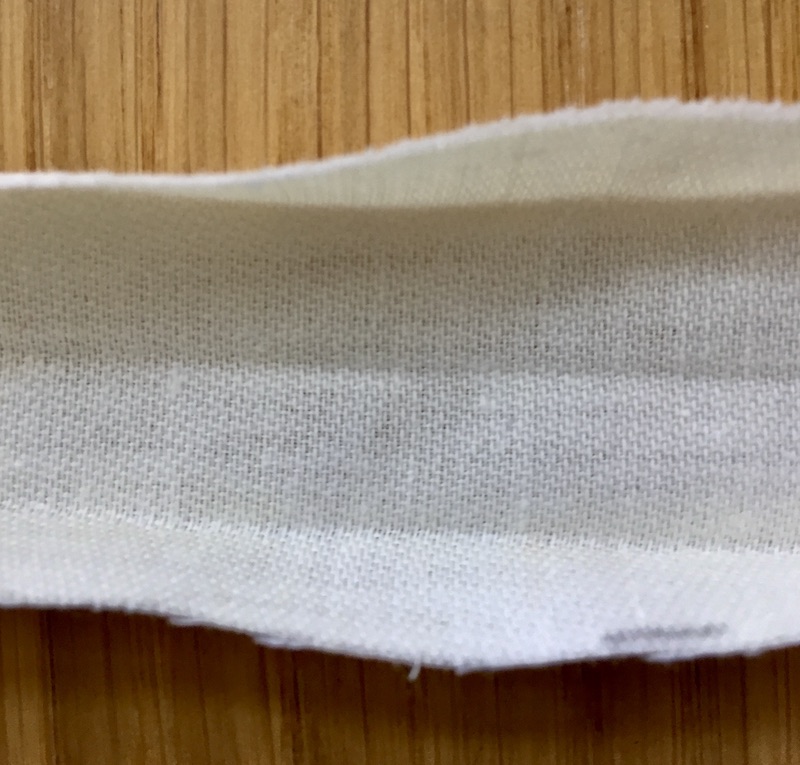
Take the smaller two fabric lengths to cover the raw side edges. The way I do this is to iron the strip in half to give a middle fold line and then bring each edge into the middle fold line and iron the folded edge to give another crease. Repeat for the other side.
This will make the smaller lengths have three fold lines.
The next part can be done in either one or two stages.
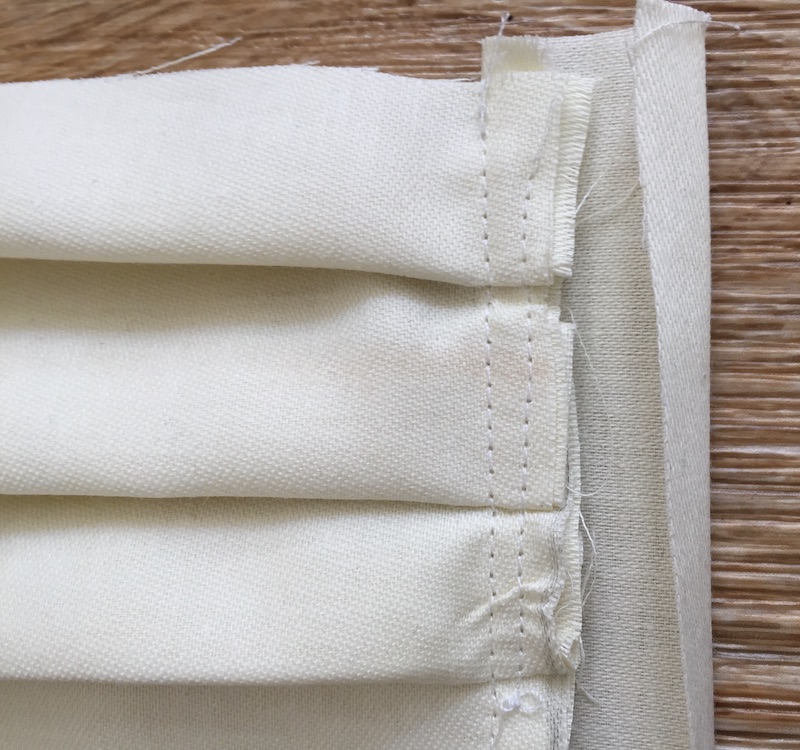
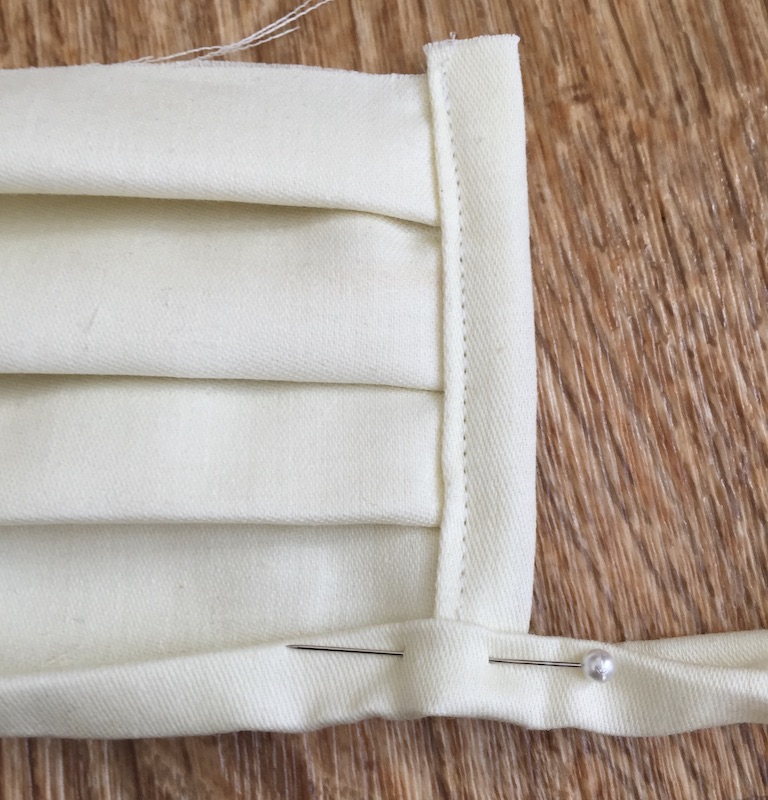
As shown in the picture take the smaller strip with one side folded into the middle and then place the side edge of the pleated mask so it lies over the top of the folded edge.
Stage 1
Sew this into position so it doesn't move, then fold the other side strip edge into the middle fold then bring the folded edge to meet or cover the previous stitching. The strip covers the raw edge of the pleated mask. Repeat for the other side.
Stage 2
Miss out sewing the first fold in place and then fold both sides so it covers the raw edges pin and sew.
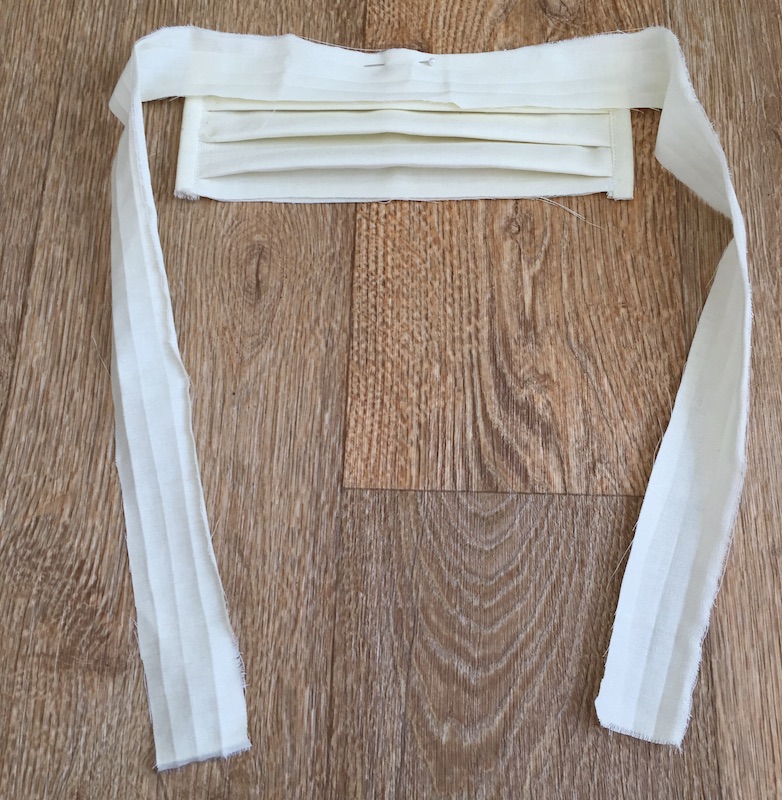
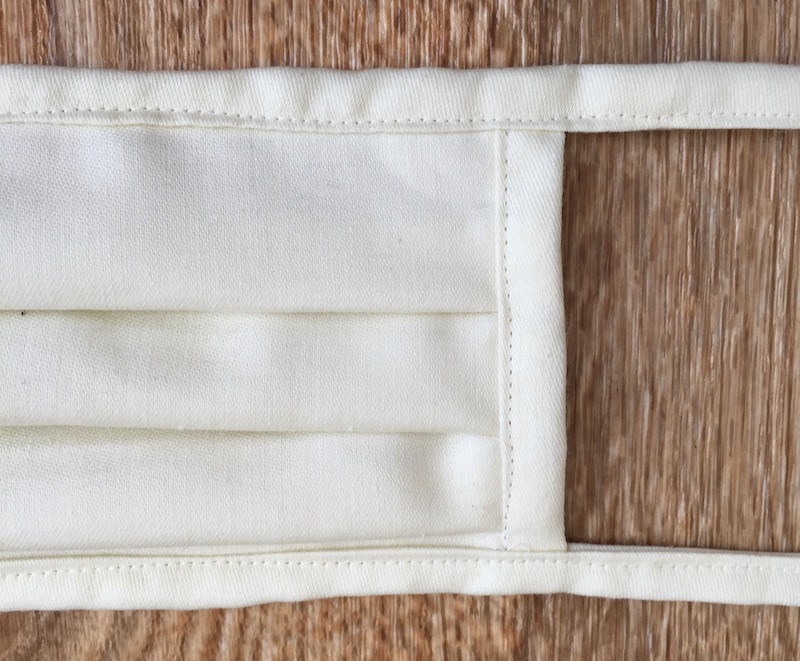
Repeat the iron folding on the longer strips, then find the middle of the strip and pin this to the middle of the mask as shown above.
From the middle of the mask place edge on middle fold of long strip.
Pin the tie strip along the top and bottom edges of the mask in the same way as you did the side edges.

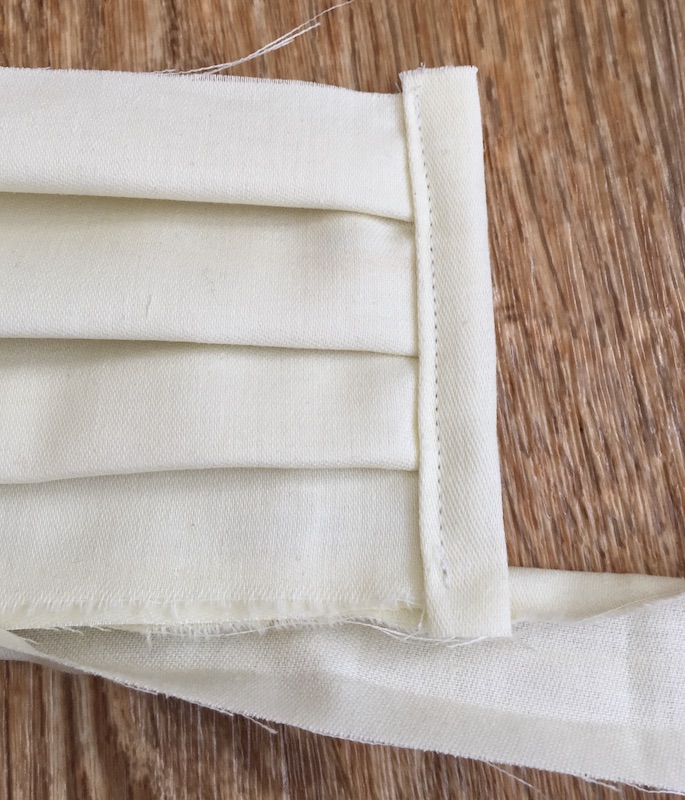
For these sides the extending ties are also sewn by folding both edges into the middle fold and then sewing along both folded edges. The end will need to be turned in and that will give a strong tie fastening.
All the edges are sewn.
There are many ways in how to make facemasks in lots of different styles with new ones appearing all the time.
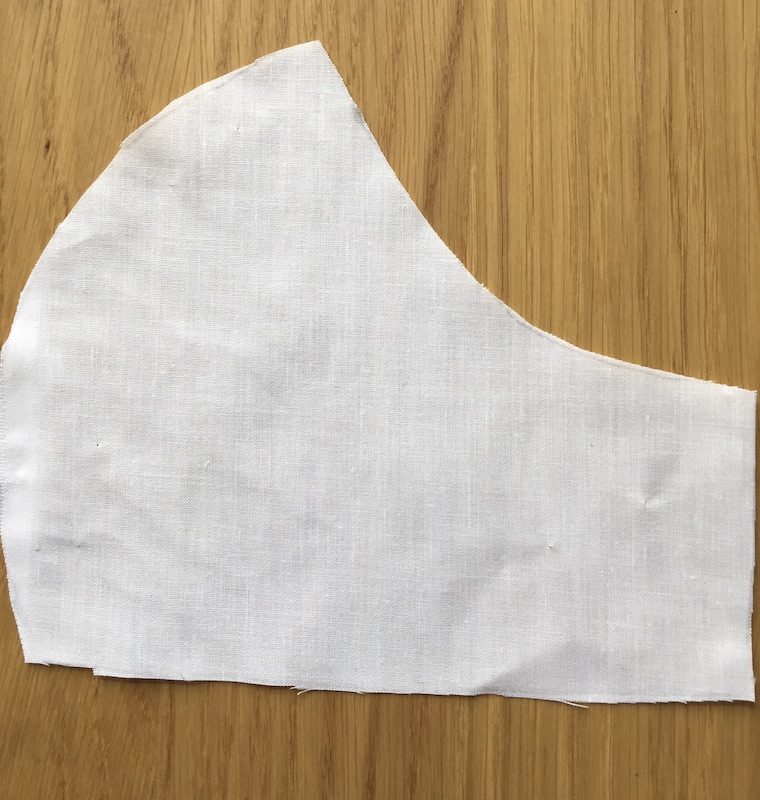
How to make facemasks - Contoured Style
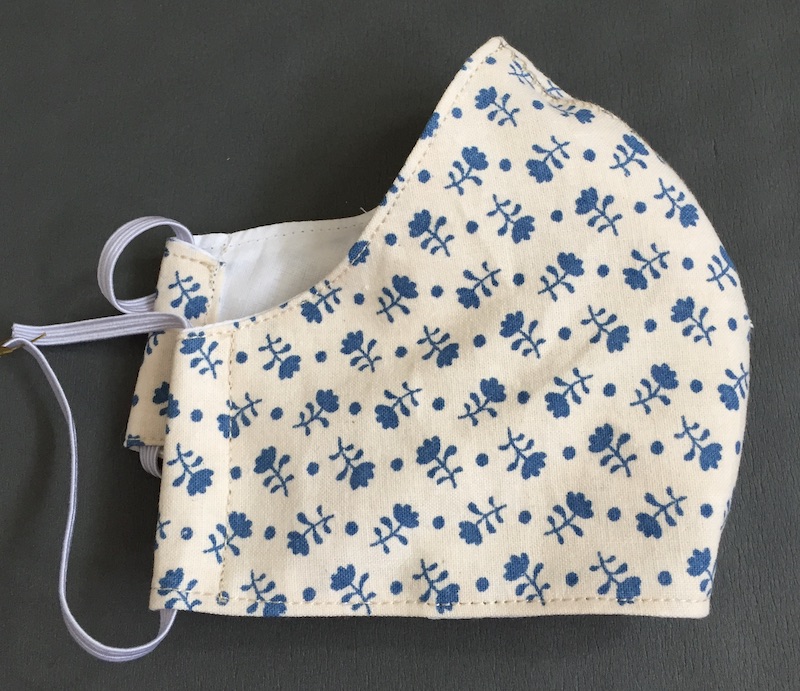
This is another style of mask and is a bit trickier to sew depending on how you want it to be done. This style still needs to be snug around your nose and mouth area and should cover from the bridge of your nose to under your chin.
These can be made simply with one layer of fabric and the raw edges finished off or with a filter pocket attached to the nose and mouth area.
I prefer this type as it feels snug across my nose and mouth area.
When you are finding how to make facemasks then it is really seeing what style suits you best.
A pattern for these types of mask can be easily found on Instagram etc and some are really large but possibly better for breathing and talking.
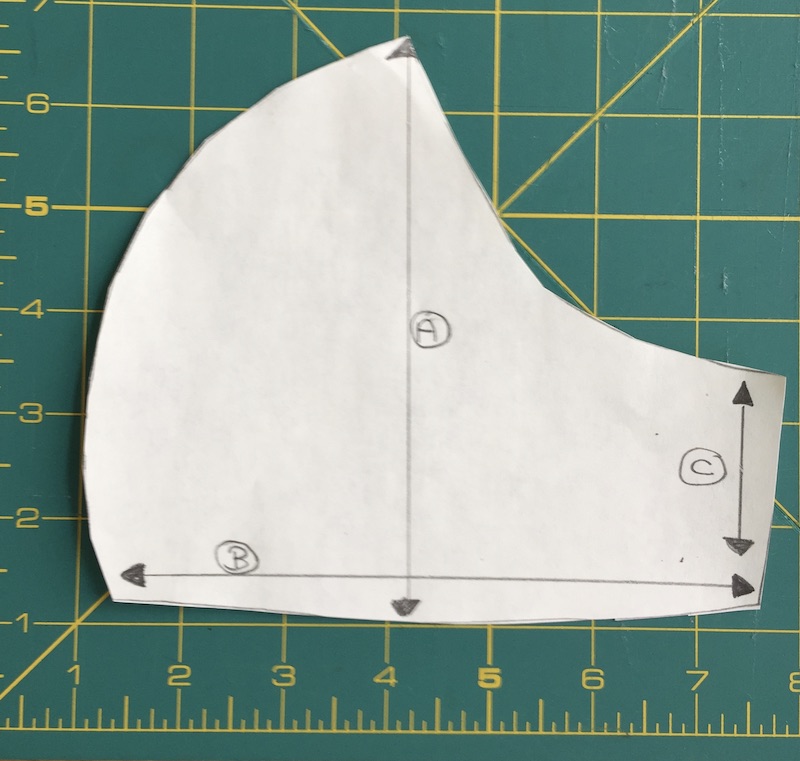
The patterns basis is
A = distance measured from bridge of nose to under chin.
B = distance measured from middle of chin to ear. (A intersects roughly halfway along B).
C = distance measured of the area in front of ear.
Please allow to all seam allowances and turnings. If you are making these for yourselves then as you sew them, try them against your face and adjust if necessary.
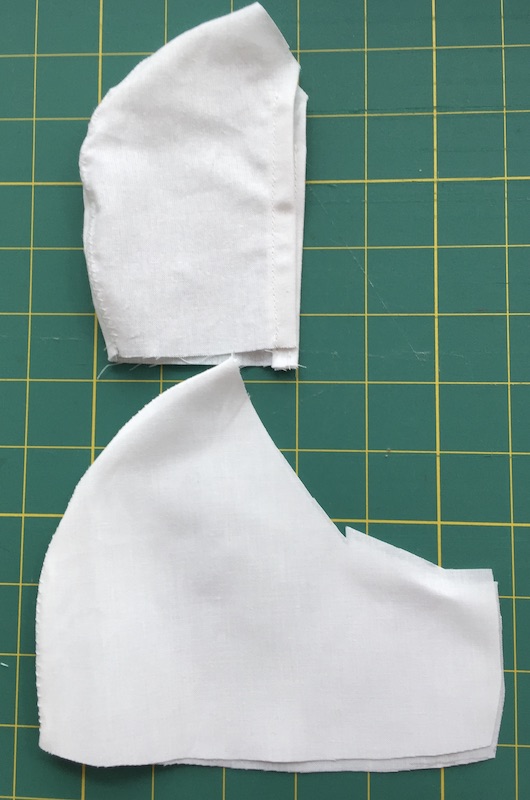
Place pattern on fabric with right sides facing in and cut two pieces for a one layer mask.
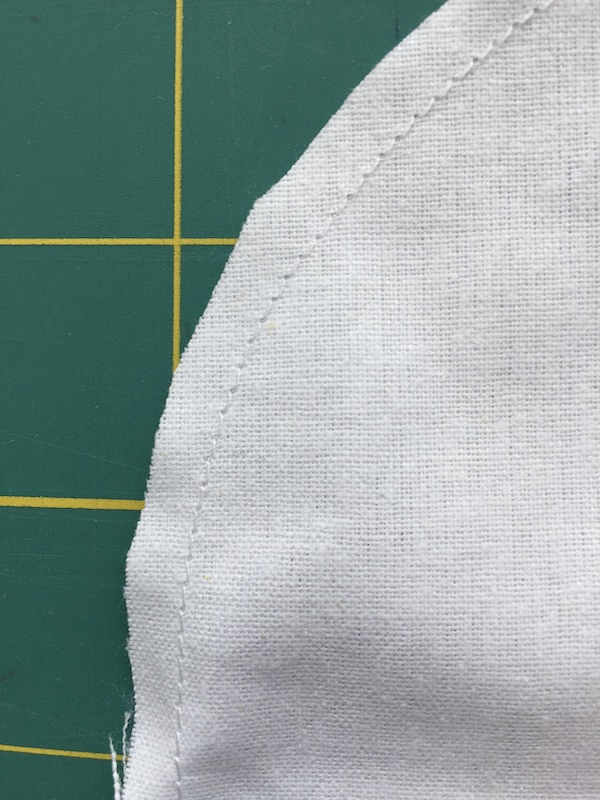
Sew front centre seam about a machine foot width away from the edge.
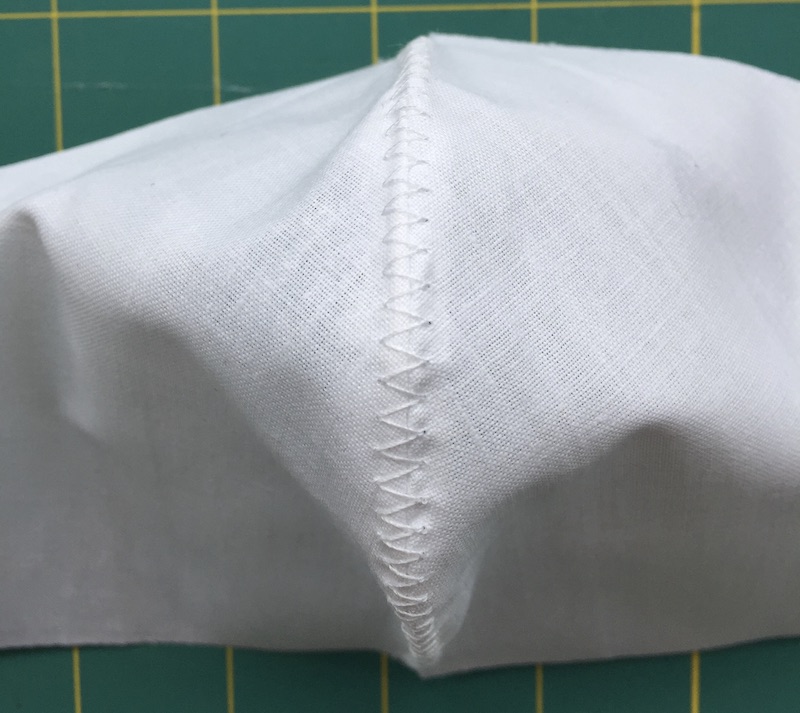
To avoid a bulky seam this front middle seam needs to be pressed open and sewn flat either with two straight lines of stitching or a zigzag stitch as shown in the picture.
That is a basic one layer contour mask.
To finish off press upper side and lower seam into the wrong side and stitch in place. Attach elastic to fit over ears on the side edges.
If a filter pocket is needed
Cut out 4 pieces of fabric and sew the front seam as described before. Shorten the sides of one of the sewn masks and turn the edges inside and sew in place.
Place front seams of masks right side facing matching the seam and edges then pin in place.
Sew the filter pocket to the mask on upper and lower edges. Turn all the mask through one of the sides to have right sides outside. Finish off raw edges by turning in and sewing. Then attach elastic.
This ensures that a filter can be slipped between the mask and your nose and mouth area.
Enjoy getting to grips with learning how to make facemasks.
Keep safe!!
Affiliate offers
Please take care with any soft furnishing that it does not come into contact with any heat source.
If you have found an error on this page or want some more information on sewing cushions.
Please contact me . Thank you