How to Cable in Knitting

Learning how to cable in knitting can make some really complicated looking patterns but it is quite easy once you get used to using a third needle that takes the wool or yarn to the front or the back as shown in the main picture.
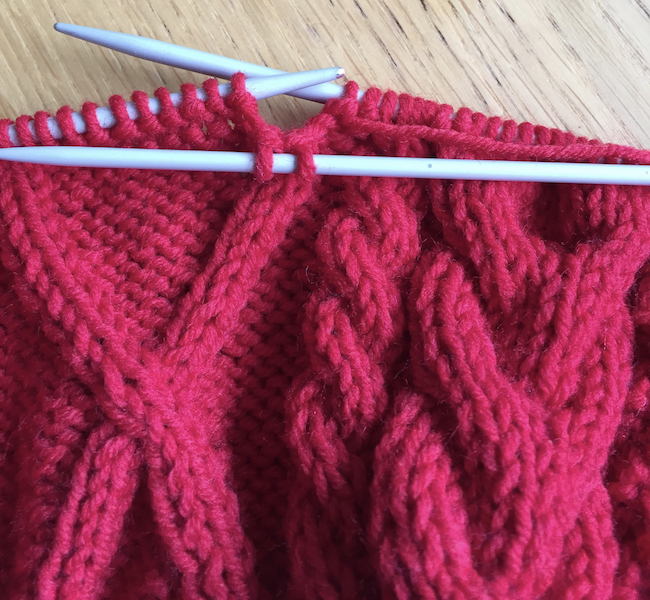
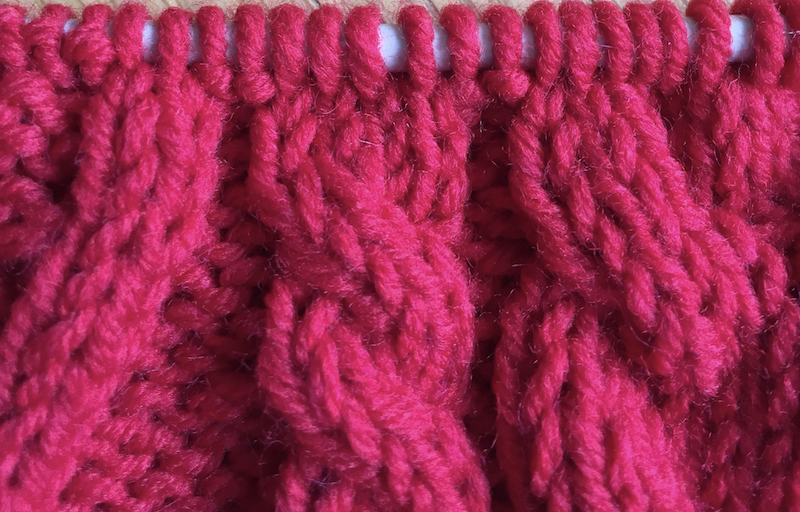
In the picture above showing a band of cable the only two stitches that are used are the knit stitch and the purl stitch. The pattern is created by using alternate stitches and a cable needle that is used to move a stitch or stitches to the back or the front of the work at different stages.
The Cable Needle
 Cable needle held to the front of knitting
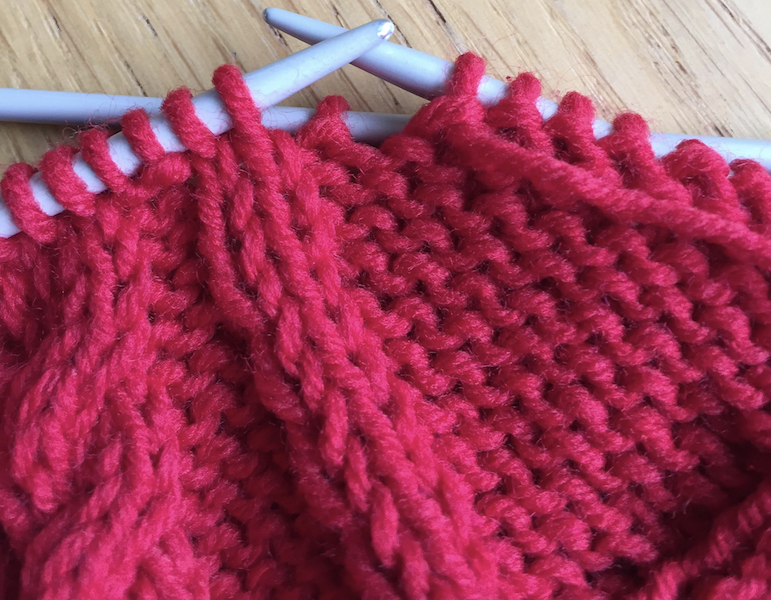 Cable needle placed to the back of knitting
 Two types of cable needles
This extra needle is usually a lot smaller that the main needles and is used to bring the knitting stitches either to the front or back of the item to form the pattern. The small needle can be straight or it can have a little kink in the middle which helps to stop the stitches slipping off.
If I am using one I tend to hook it back into the knitting to keep the stitches on until I need them again. This was after losing my stitches a few times.
When working from a pattern, all the abbreviations needed to make the cable will be given.
How to cable in knitting - some patterns
Explanations of the Cable Knitting Stitches used in the main Picture and More
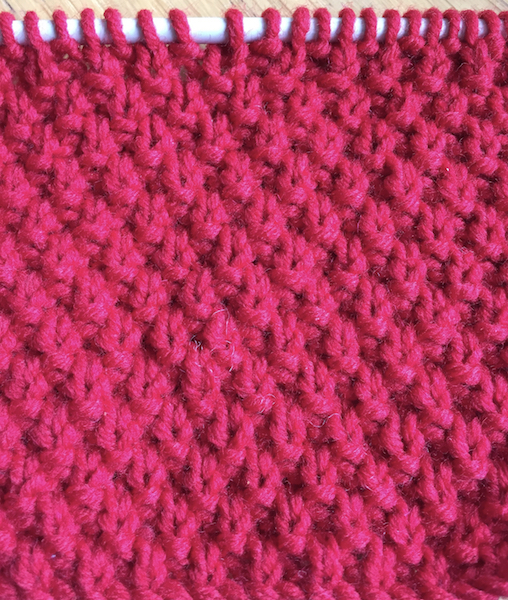
This is basically a knit one purl one rib stitch that is done for two rows.
On the third row the stitches are alternated so where on row 2 there was a knit stitch on row 3 a purl stitch would be done and then following along the 3rd row alternating the knit and purl stitches.
Change the stitch pattern at the start of the row every two rows.
This group of 12 stitches is done as stocking stitch (one row knit then the next row purl alternately).
Every 7th row stitch 1,2 & 3 are placed on a cable needle and held to the back of the work. Then stitch 4,5 & 6 are knitted as usual. Then stitch 1,2 & 3 are knitted off the cable needle.
Then stitch 7,8 & 9 are placed on the cable needle and held to the front of the work. Stitches 10,11 & 12 are knitted as normal then stitches 7,8 & 9 are knitted off the cable needle.
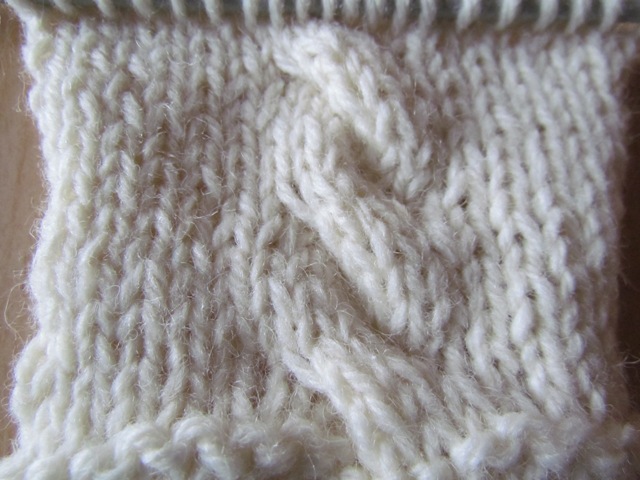
The group has four stitches and the first two stitches are place on the cable needle and held to either the front or the back depending on how the twist is to be (but always the same way once started).
This picture shows stitch 1 & 2 placed on a cable needle and held at the front then knit stitch 3 & 4 and then 1 & 2 off the cable needle
This picture shows basic cable where a set of six stitches is used. I knitted up to a certain point then placed three stitches on a cable needle and held them to the front of the knitting, stitches four, five and six were then knitted first and then the stitches on the cable needle were knitting afterwards. The rest of the row was knitted as normal and this cable was repeated every six or eight rows depending on how long the cable twist was to be.
There is also many stitch patterns that give a mock twist. These stitches are done by placing two stitches on a cable needle, placing it in front of the work, knitting two stitches of the work and then the two off the cable needle.
It is basically moving them across by two stitches for a few rows and the beginning again on the row that the cable has ended on. This pattern is not a twist as such but a slanting line.

This cable stitch uses the cable needle to place the stitches to the front of the work and then to the back on different rows of the pattern. This gives a chunky rope type look about it.
How to Cable in Knitting - The Diamond Pattern
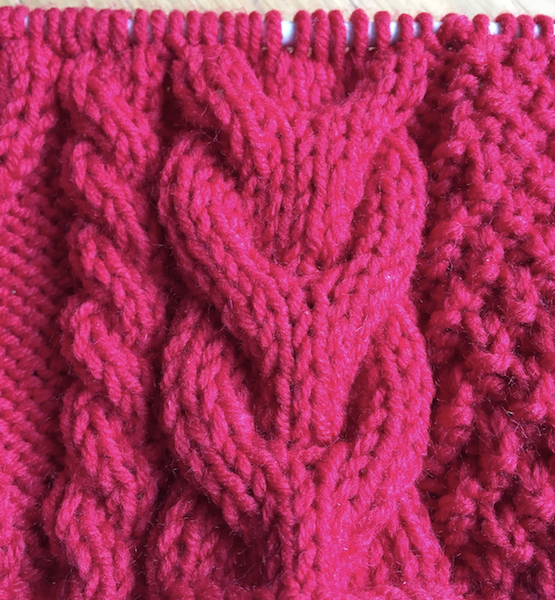
The diamond pattern in the centre of the main picture is done by having 4 knit stitches and then on every right side two of these stitches are moved in the opposite direction. This is done by placing the purl stitch before the first set of two knit stitches onto a cable needle, this is then brought to the front, then two of the knit stitches were knitted and then the purl stitch from the cable needle.
The next two knit stitches are then placed on the cable needle and held to the front of the work, a purl stitch is then knitted and then the two knit stitches from the cable needle.
The number of purl stitches between the knit stitches will increase taking the knit stitches further apart, then they a brought closer together until the four knit stitches are all in a row ready to cross over each other.
The pictures below show them getting closer together.
To make the pattern stand out the background stitch is a purl stitch.
The first two knit stitches held to the front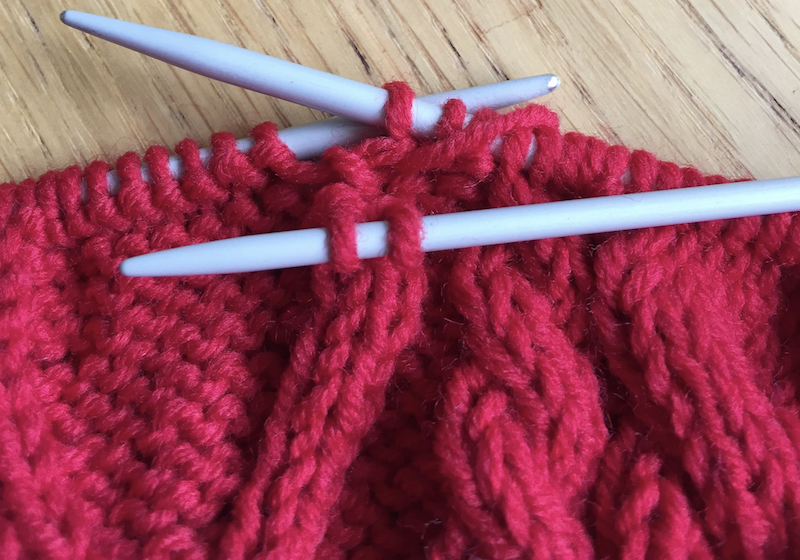 Purl stitch after the two knit stitches is then done.
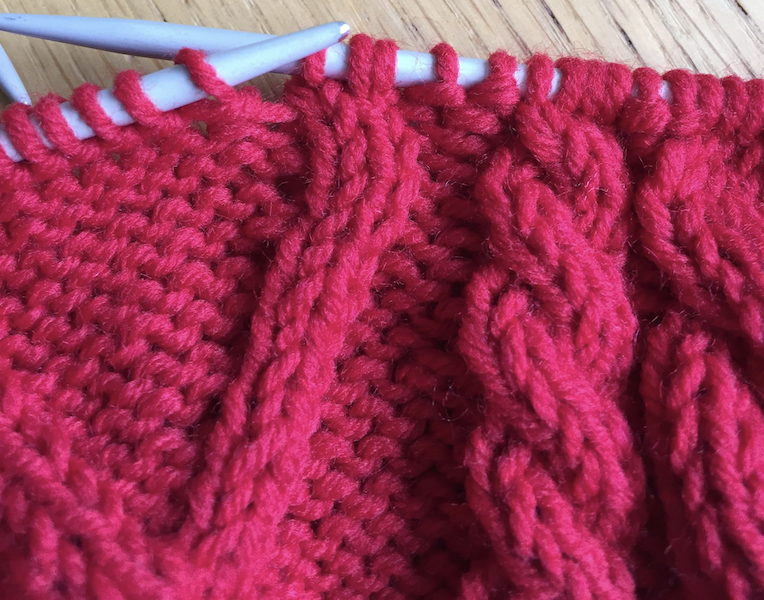 Then knit the stitches from the cable needle.A purl stitch is on the cable needle and held at the back of the knitting. Knit the next two stitches and then purl one from the cable needle.
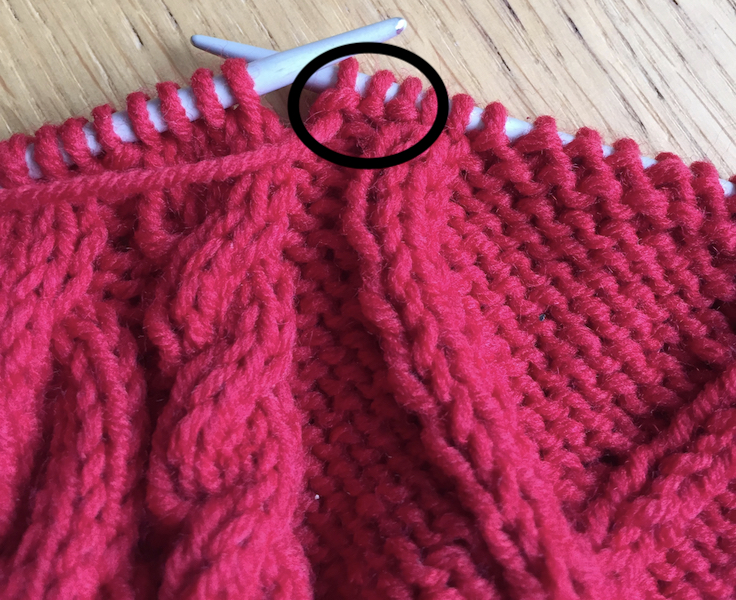 This shows the increase in purl stitches after the two knit stitches.
The Wrong Side of the Cable Knitting Panel
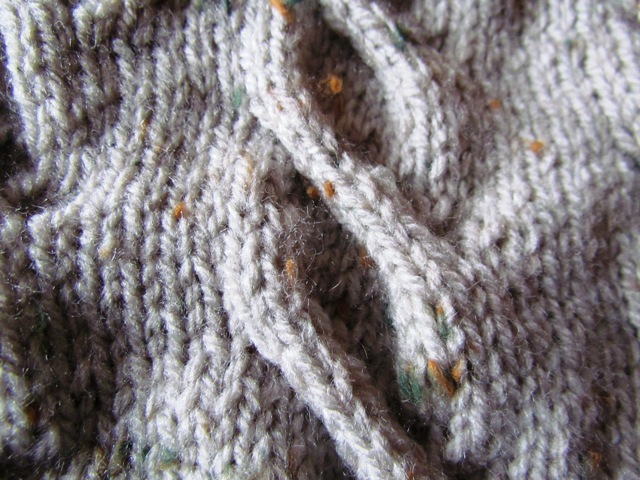
 This picture shows the back of the diamond work and the circle and the arrow are pointing to purl stitches while the box is showing the knit stitches.
By looking at your cable knitting you should know what stitch you are about to do or have done. A little bump indicates a purl stitch (the wrong side of stocking stitch) while a chevron is a knit stitch (the right side of stocking stitch).
This can also be reversed as shown above if the purl side of stocking stitch is the right side.
Have fun learning how to cable in knitting.
- Home
- Knitting for Beginners
- How to Cable in Knitting
Affiliate offers
Please take care with any soft furnishing that it does not come into contact with any heat source.
If you have found an error on this page or want some more information on sewing cushions.
Please contact me . Thank you