How to read Knitting Patterns
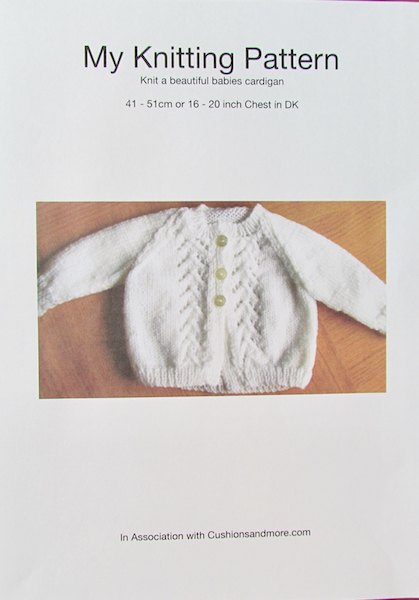
Learning how to read knitting patterns isn't as hard as most people think. Many bought patterns give multiple size references which makes it look a lot more complicated, this can be overcome by circling the size then the relevant size stitches in different colours. Choose the same colour for each different size and stitches.
The pattern will usually give the first size and include the larger sizes in brackets and then the pattern guidelines can be seen in knitting abbreviations. If any abbreviations are unique to a particular pattern then this will be shown at the start in the guidelines.
A pattern will give step by step instructions for the parts of the garment that are to be made. For example a cardigan (no matter what size) will be broken down into
- The Back
- The Left Front
- The Right Front
- The Two Sleeves
- The Neckband for the buttonholes
I would always advise someone learning how to read knitting patterns or doing anything they find a little daunting to break the task down into bitesized pieces.
If a pattern looks overcomplicated then just look at the first piece that needs to be made. Get that done and the second piece doesn't seem too bad...etc..etc.
A jumper will have
- one back,
- one front
- and two sleeves.
If you are learning how to knit a scarf then you will just have one piece unless it is a patchwork knitted squares one.
Examples of how to read knitting patterns.
A Lacy Pattern
This is the first row of a lacy pattern,
"K.2, y.fwd. sl. 1, K.1,p.s.s.o. K.3, K.2 tog, y. fwd, K to end"
Broken down it reads
- K.2 = knit 2 stitches
- y.fwd = yarn forward (bring the wool to the front of the knitting),
- sl.1 = slip one stitch (pass stitch from one needle to the other without knitting)
- K.1 = knit one stitch
- p.s.s.o = pass the slip stitch over the one that has just been knitted
- K.3 = knit 3 stitches
- K.2 tog = knit 2 stitches together
- y. fwd = yarn forward
- K to end = knit to the end of the row
When the wool is brought forward and then the slipped stitch is passed over the second stitch that has been knitted normally, this will give the first hole in the lace pattern. Similarly when two stitches are knitted together and then the wool is brought forward afterwards then the rest of the stitches are knitted normally this will give another hole in the lace pattern.
Lacy Pattern Steps - Video
A Cable Pattern
These patterns can give a few headache if the pattern is very complicated and can make learning how to read knitting patterns a bit of a trial. Taking it one step at a time is really worth the effort.
This is the first row of a sweater with a cable pattern which is a bit more complicated. The beauty of a cable pattern is that they are usually centralised.
(Right side), P7[10,4,8,2], (K2,kyb sL2P,K2,P6) 1[1,2,2,3] times, *P5, C4FB, P5; rep from * once more, (P6, K2, kyb sL2P, K2) 1(1,2,2,3) times P7[10,4,8,2]
Broken down this reads
- (Right side) = This lets you know that odd rows are the right side
- P7[10,4,8,2] = Purl the number of stitches for the size you need starting with the smallest size outside the brackets.
- (K2,kyb sL2P, K2,P6) 1[1,2,2,3] times = knit 2 stitches, keeping the wool at the back of the work slip 2 stitches purlways, then knit 2 stitches and then purl 6 stitches then repeat all the work in the brackets for as many times as it indicates for the size needed.
- * = indicates a start point
- P5, C4FB, P5; repeat from * once more = purl 5 stitches, cable 4 stitches which means slip two stitches onto a cable needle and bring to the front of the item then knit into the back of the next two stitches and then into the back of the two stitches on the cable needle, purl 5 stitches. The whole cable pattern is repeated once more as indicated by the star.
- (P6, K2, kyb sL2p, K2) 1(1,2,2,3) = purl 6, knit 2, keep wool to the back of the work slip 2 stitches purlways, knit 2 stitches then repeat all the work in the brackets for as many times as it indicates for the size needed.
- P7[10,4,8,2] = Purl the number of stitches for the size you need starting with the smallest size outside the brackets.
The middle of the pattern is after the first cable part and then the rest of the row is a mirror image of the start of the row.
The cable part will be included in the pattern and other abbreviations will also be explained in the pattern. Sometimes there are a number of rows that will make a complete pattern either 12 , 18 or as many as 24 rows and after a few are done it is possible to predict when an action is needed.
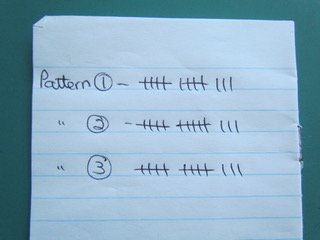
Sometimes the pattern is a sliding one and moves to the right or left or it is a pattern that is not clearly defined so I get a paper and pen and do a five bar tally on how many rows I have done for each pattern and start again when onto another pattern just so I know where I am.
Other patterns are shown as a grid and symbol system that will show what stitch needs to be done at a certain point along the row. Make sure you follow the row numbers at the side of the grid where marked and take note of the direction to follow.
Enjoy and have fun learning how to read knitting patterns.
- Home
- Knitting for Beginners
- How to Read Knitting Patterns
Affiliate offers
Please take care with any soft furnishing that it does not come into contact with any heat source.
If you have found an error on this page or want some more information on sewing cushions.
Please contact me . Thank you