Making Memory Quilts from Children Clothes

Turning these clothes into memory quilts can be done in different ways, each one turning out to serve as a reminder of early days of child or babyhood.
I have made two, both used old children's clothes, one made into a picture and then drawn onto the cloth and the other done with basic patchwork squares. Both were well loved when they were finished.
The decision in which design to follow is completely personal as each will be unique. Let your imagination go wild and see what you can come up with just think of a picture that has a lot of pieces on it. It could be very complicated or just lots of hearts, leaves or circles on the quilt.
Preparing the Fabric for the Memory Quilts.
Picture Making
Draw the chosen picture first on paper until the right image or story has been found. For a memory quilt the picture needs to have many aspects to it or a repetitive nature so that a lot of different kinds of clothes can be used.
The ideas could be leaves on a tree or some leave on and others fallen. Another idea could be a teddy throwing a lot of hearts into the air, I have done an ordinary quilt with petals on and falling off a flower which could be incorporated into a memory one.
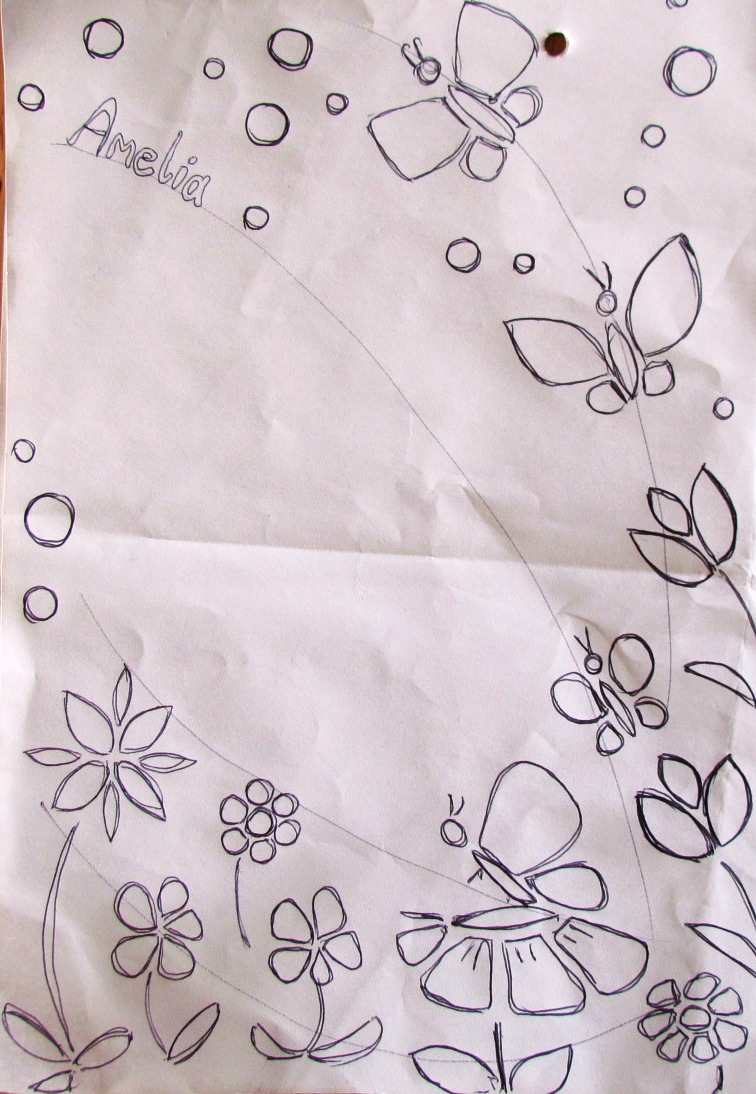
The picture chosen in this first case was a flower garden.
Transferring from Paper to Cloth
Next the picture that has been drawn will need to be copied lightly on the fabric that will be the top of the quilt. When doing this extra flowers, butterflies and circles were include as there was a lot of space to cover going from an A4 size piece of paper to fabric two metres wide by three metres in length. It was decided at this stage to have all the stems, leaves and butterfly bodies in the same fabric as there was a lot of the one sort.
After the design was on the fabric, templates were made from cardboard to act as templates for cutting out the fabric.
Appliquéing the Fabric from Clothes into the Design
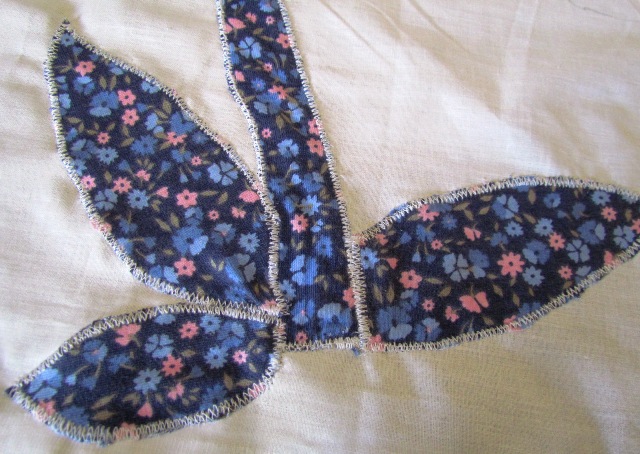
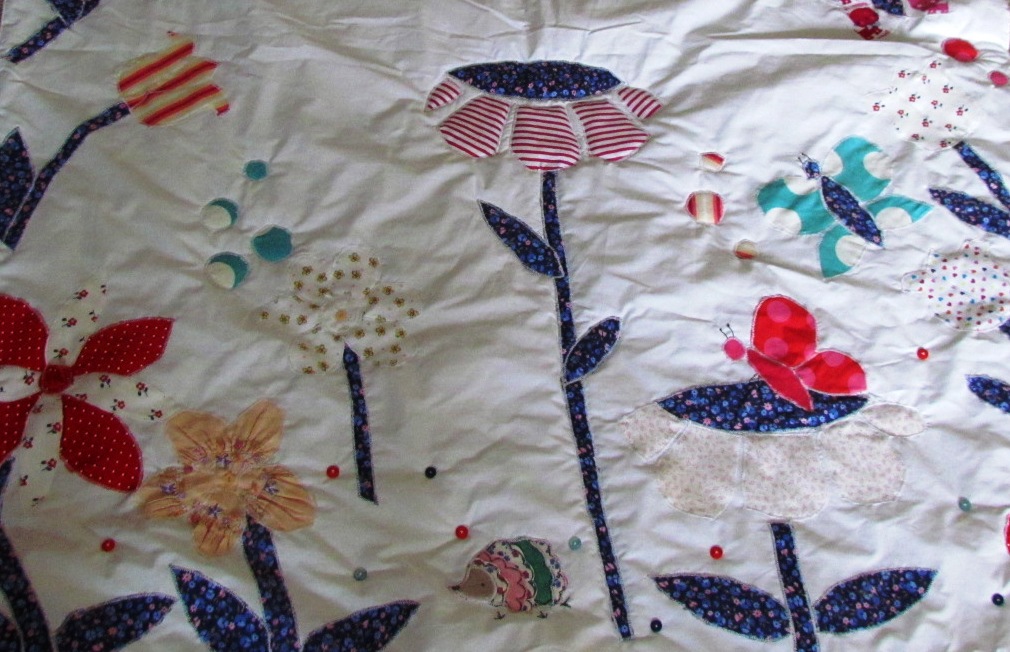
The cut out fabric shapes were then pinned and eventually appliquéd on the fabric. Picking the parts of the fabric depended on the size needed as baby clothes can be rather small. The natural patterns and original sewing attributes were kept intact if possible to add interest and recognition such as gathering and smocking on a peach coloured flower and the little hedgehog motif underneath the tall flower.
Putting It All Together
When all the parts of the picture were sewn in place the quilt was finished off like a quick quilt or the quilt part in a making a Quillow.
The top fabric was placed right side up, the bottom fabric was cut to size and placed on top right side down and then the wadding or batting was cut to size and placed on top of the bottom fabric.
All the layers were pinned together and the seam sewn leaving an opening on one of the shorter sides so that the quilt can be turned right side out.
After turning right side out the opening is pinned along the seam line with the raw edges turned inside the quilt. Then the quilt can be top stitched all around the four sides which will hold all layers in place and closed the opening.
Sewing the edges in place left large areas of the quilt without the layers fixed together. Make sure that most of the areas of the quilt had some top stitching (going through all the layers top, bottom and batting layers) done, on the one shown some of the stalks, petals, butterflies and circles were top stitched in different places on the quilt. Buttons from the garments where then attached as well.
Enjoy making your quilts.
Return from Children's Clothes Memory Quilts to Homemade Quilts
Affiliate offers
Please take care with any soft furnishing that it does not come into contact with any heat source.
If you have found an error on this page or want some more information on sewing cushions.
Please contact me . Thank you