Patchwork Quilts
Using Used or New Fabric
Making patchwork quilts is a fun way of using any leftover new fabric. Whether the fabric match each other or not, makes a pattern, picture or just sewn together the end result will be great. The best fabric to use is cotton or a high cotton mix as this tends not to stretch.
Using baby or children's clothes can give additional problems due to the stretch of the clothes. But it can be done with patience.
The basic stages are the same if using brand new material or any type of old material. The quilt can become a memory one if made out of outgrown or old clothes. A vintage one can be added to the list if the fabric was bought a long time ago and looks dated.
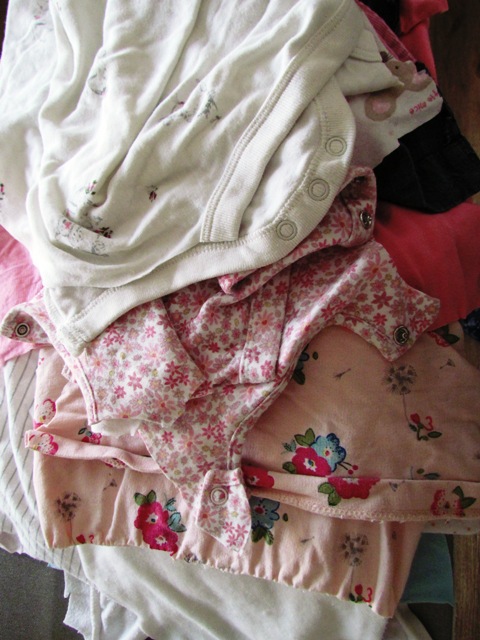
Imagine turning this pile of clean, worn, no longer wanted, clothes that once belonged to some children into a lovely warm quilt.
What a wonderful way of keeping the baby or childhood memory alive that no one else would have.
There is a good range of fabrics from many on line retailers to help make or finish your item.
Making Patchwork Quilts
Sizing
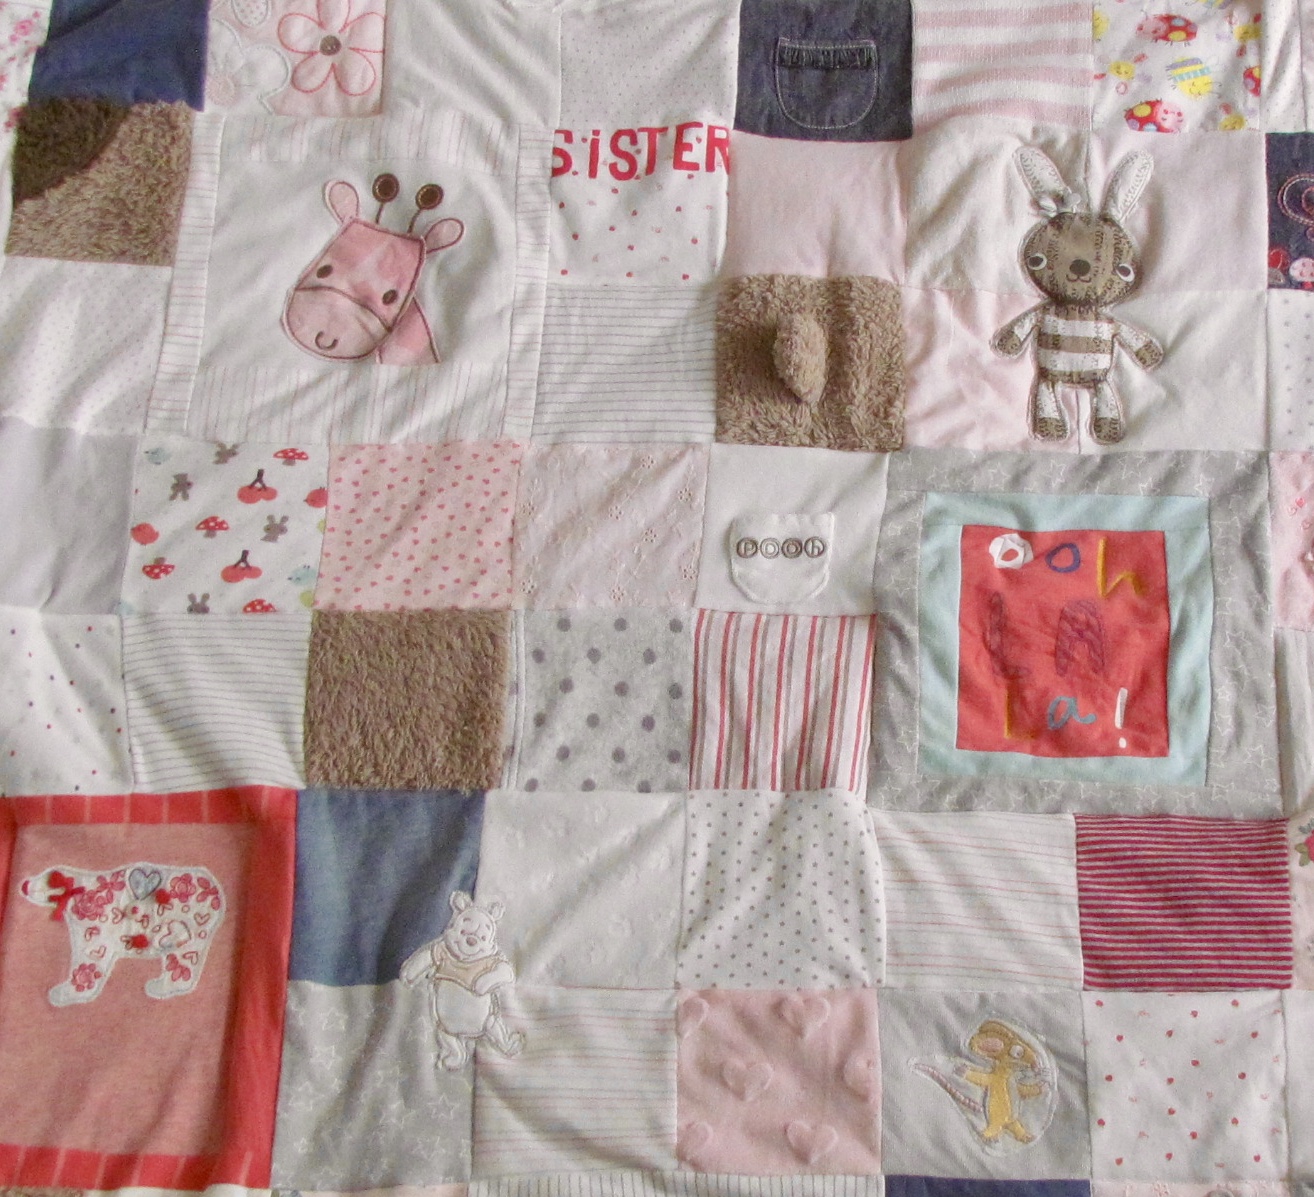
First decide on the size of the overall quilt for the one above is 91.5 cm (36 inches) wide by 102 cm (48 inches) long.
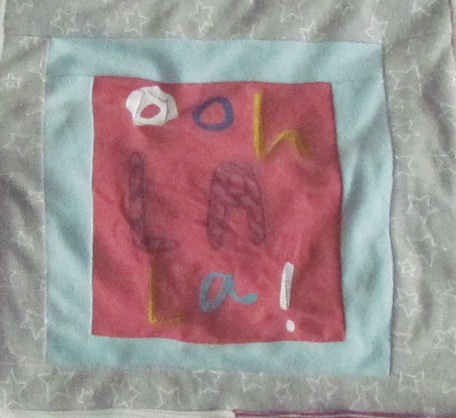
Then decide on the size of the material square or "patch". The material came from baby clothes so the patch size was 12.75 cm (5 inch) square including seam allowance of 1.25 cm (1/2 inch) giving 10 cm (4 inch) square when sewn.
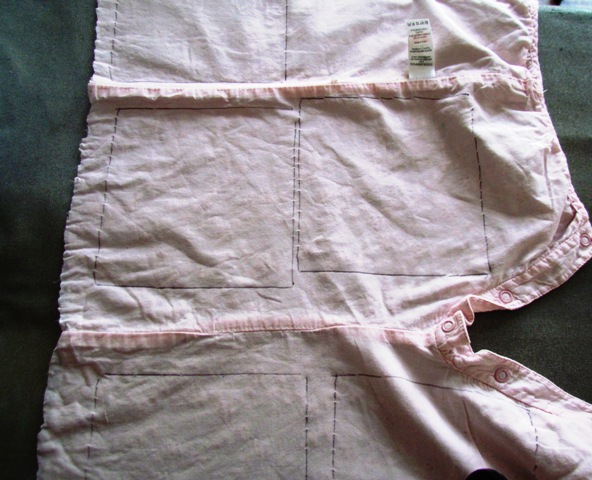
Make a cardboard template to trace around and cut out the required amount of squares which from new fabric is straight forward but a bit tricky finding the space from the clothes.
Sewing
When enough squares have been cut out, the sewing together into strips starts. This is when both the designing and joining together can take place at the same time. I find that placing the squares out ensures that the colours are spaced out well.
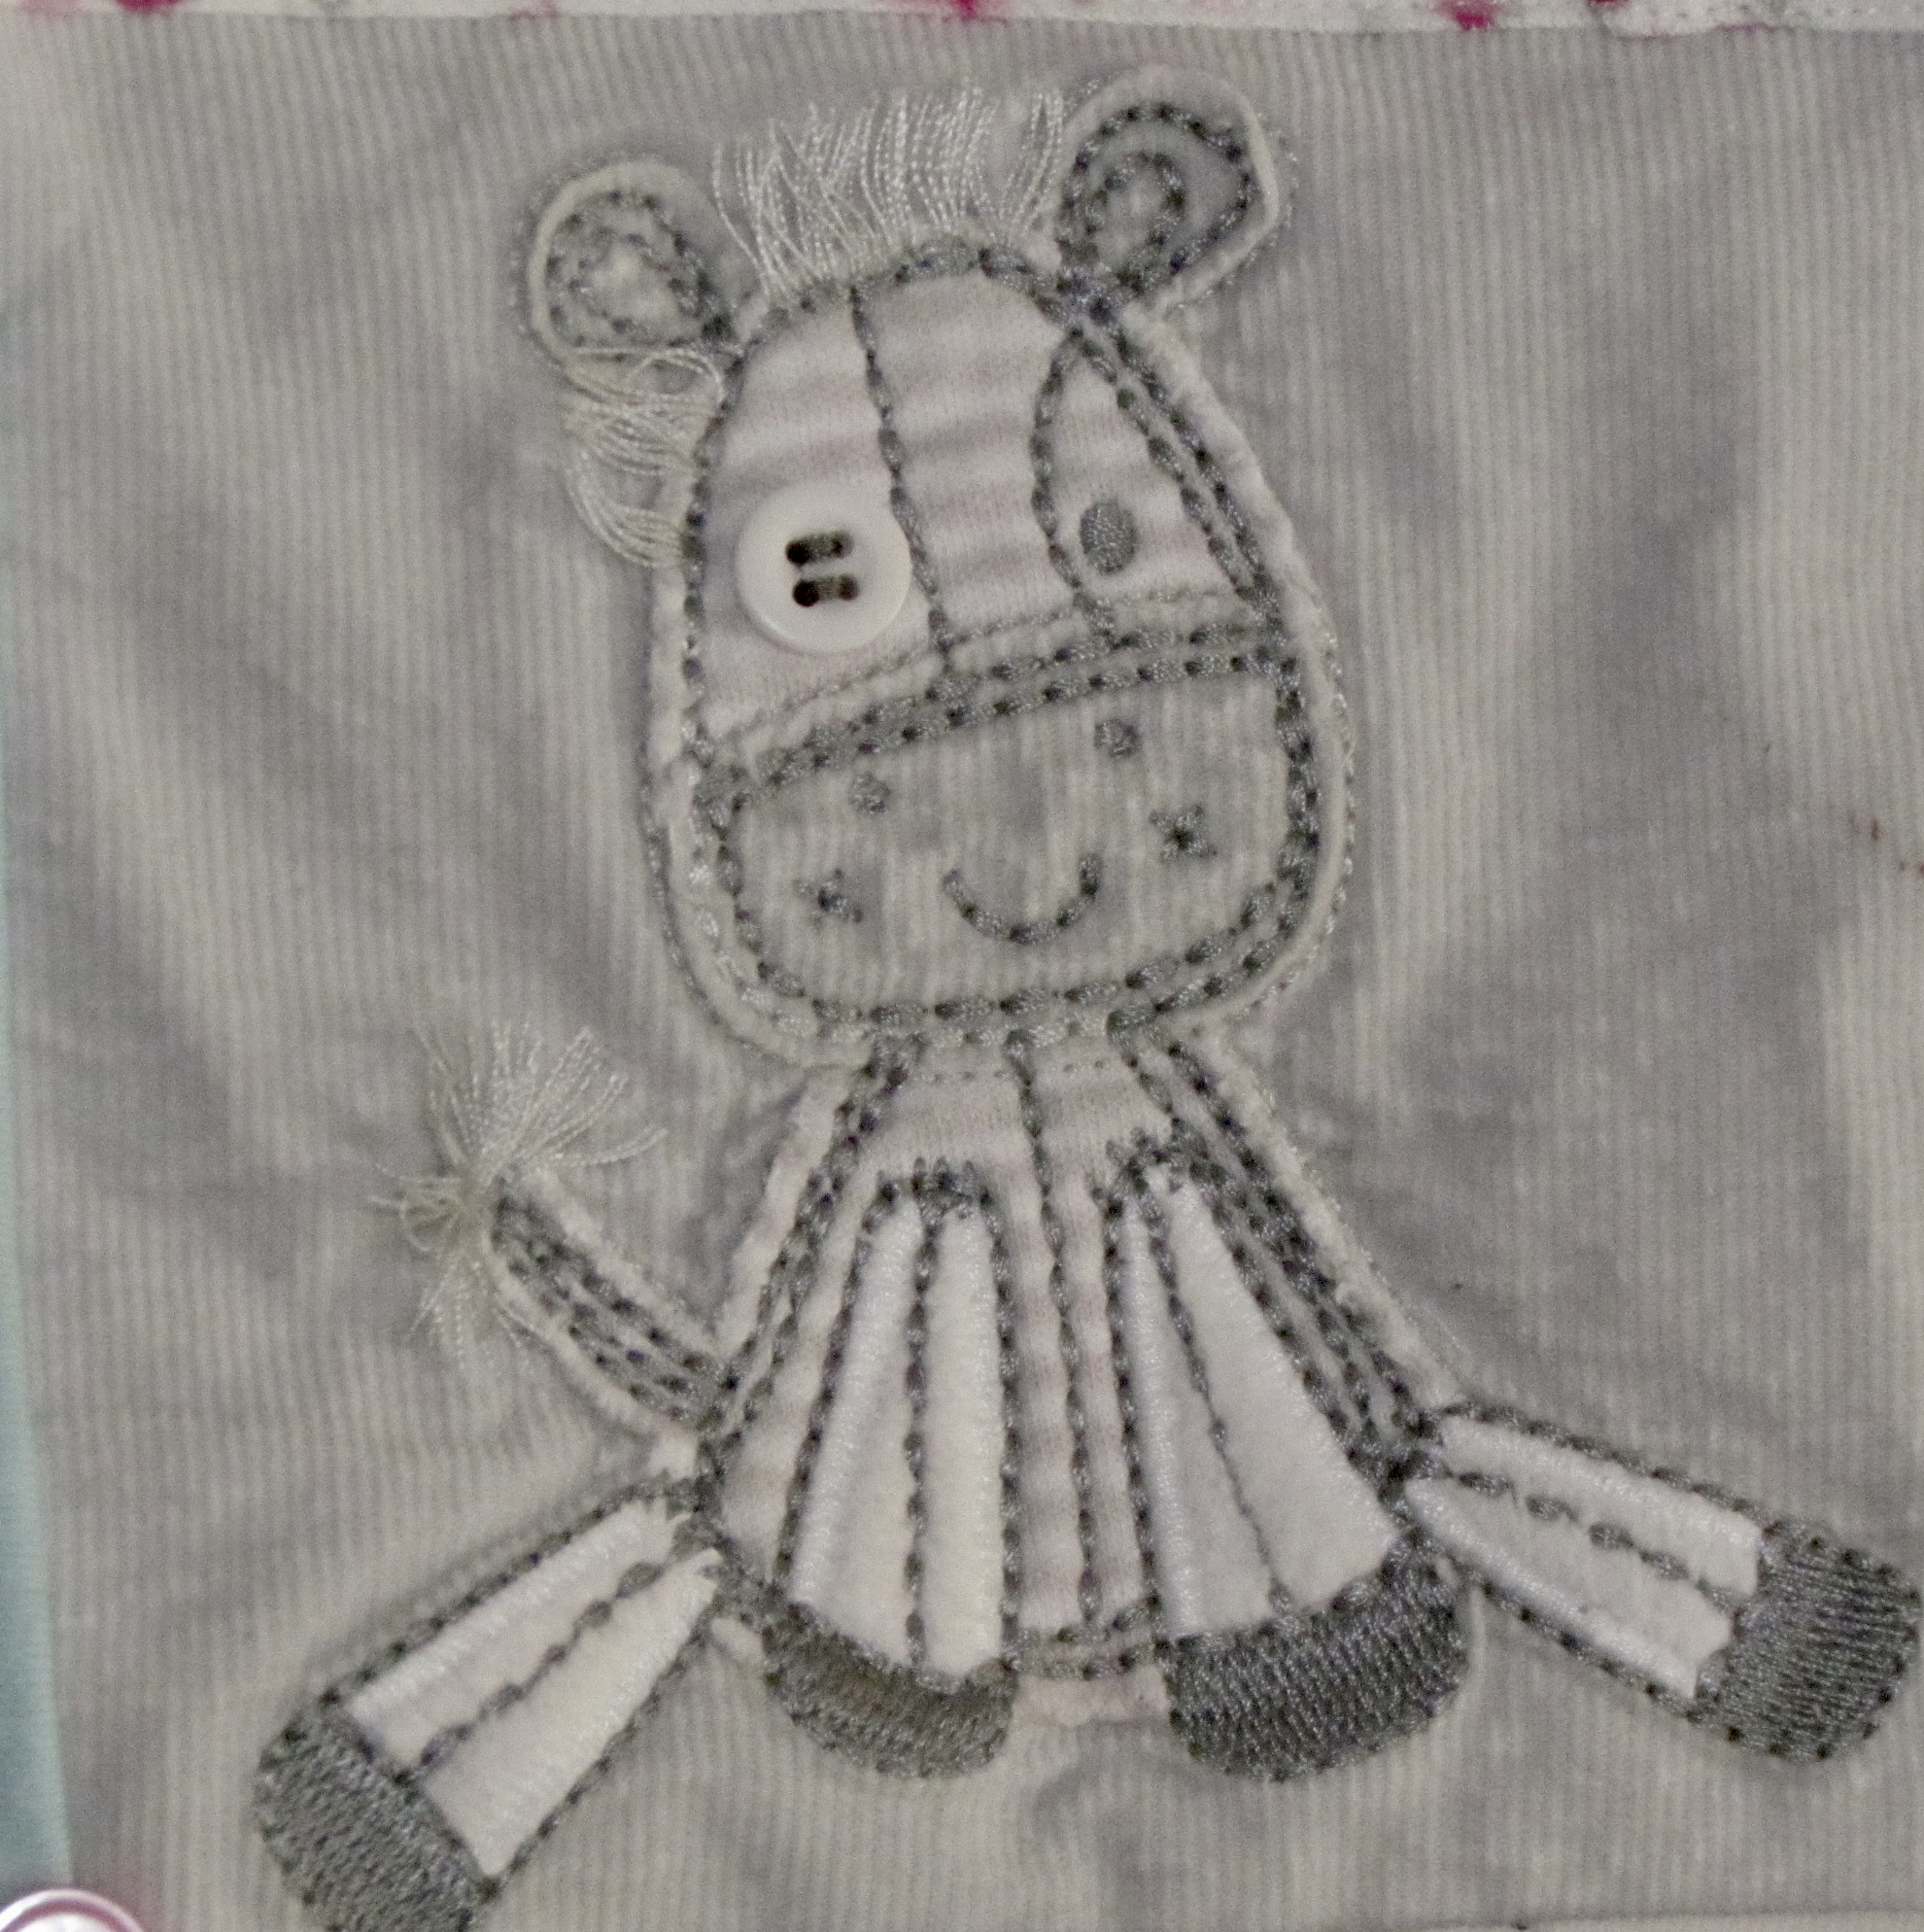
When making these out of clothes I like to incorporate some design factors from the clothes such as the fabric design and pattern or some aspect sewn onto the clothes as a motif or pocket. Sometimes the motif was too large for the patch height wise but not wide enough width wise so the square was made the size of two squares with extra fabric.
Putting the layers together.
- Once the squares of the top layer is sewn together, the wadding middle and the plain bottom layers are cut out to size.
- Place top layer right side up, then place bottom layer right side down so both right sides are facing each other, place the wadding layer on top of the bottom and top layer.
- Sew all around the edge remembering to leave an opening to pull the quilt through so the right side is facing out. When this is done the gap can be top stitched closed.
- The three layers need to be held together and this is done by stitching along various places on the quilt making sure the majority of the width and length of it is covered.
- I stitched along seam lines, around the motifs, wordings and along stripes, checking the back to see if all areas had been covered. the art of quilting is a new subject in itself and can be very time consuming so this sewing is more for quick quilt sewing.
With new fabric or all cotton fabric the quilt can be double sided if wanted. In the case of the above one made from old clothes the bottom layer was a plain dusky pink polyester cotton mix to minimise the stretch of the top layer.
I really loved making this patchwork quilt and hope you enjoy making some as well.
Return from Making Patchwork Quilts to Homemade Quilts
Affiliate offers
Please take care with any soft furnishing that it does not come into contact with any heat source.
If you have found an error on this page or want some more information on sewing cushions.
Please contact me . Thank you