Sewing Darts
Sewing darts into clothes will help to bring the garment nearer to the body, give shape or make the fabric a little smaller in certain places.
These are usually place near the bust line in blouses and tops, near the waistband in trousers and skirts and in dresses some can be found either side of the zip around the waistline. They could also be used at the shoulder line and near the elbow.
On a paper sewing pattern the marking are usually printed onto the paper showing the with dots the outline that needs to be marked. The tapered point of the dart always faces the fullest part of the area it is designed to help give shape to.
The bust, shoulder, waist or elbow dart will begin from the side seam and a dart that is used to bring in the waist line near the zip in dresses or near the back seam for a jacket will begin in the middle of the fabric.
Depending on the amount of shape needed for the garment will depend on the size of the dart.
Steps to Sewing darts.
Before the darts can be sewn the pattern is placed onto the fabric, pinned in place and then any points of interest such as the darts have to be marked onto the fabric.
This can be done with needle and thread or with tailor chalk pencil. The dots within the dart have to be highlighted onto the fabric as that will give the position to sew them.
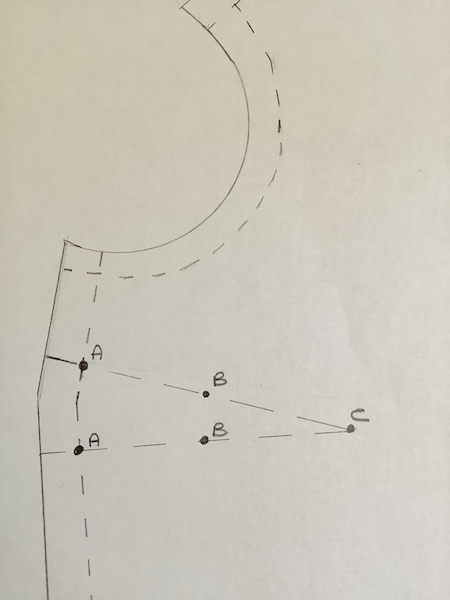 Dart starting from the seam edge.
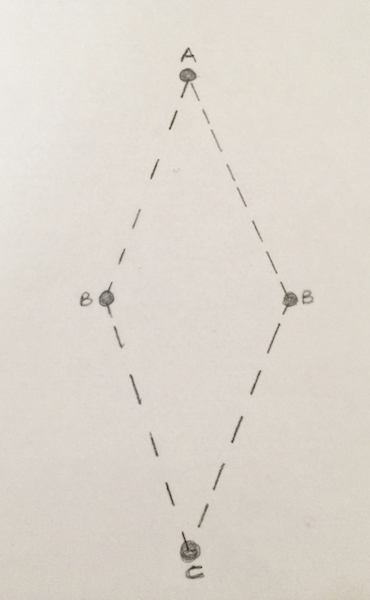 Dart starting within the body of the garment.
Sewing darts at the side of a garment.
This is where a dart starts from the seam edge. This could be near the bust line or coming down from the waist of a skirt or trousers.
Before the pattern is removed from the fabric the dots A (x2), B (x2) and C (x1) will need to be indicated or marked on the fabric by needle and thread or tailor chalk.
If using another type of marker be careful that it will not show permanently through the fabric and that it will wash out.
 Tailor tack markings at dart dots
The pattern will state at what stage the darts are sewn in making a garment.
The markings at the two dots A + A and B + B are brought together and pinned in place.
The dot at C is almost folded in half with the fabric in the shape of the dart tapering off resembling a long thin triangle.
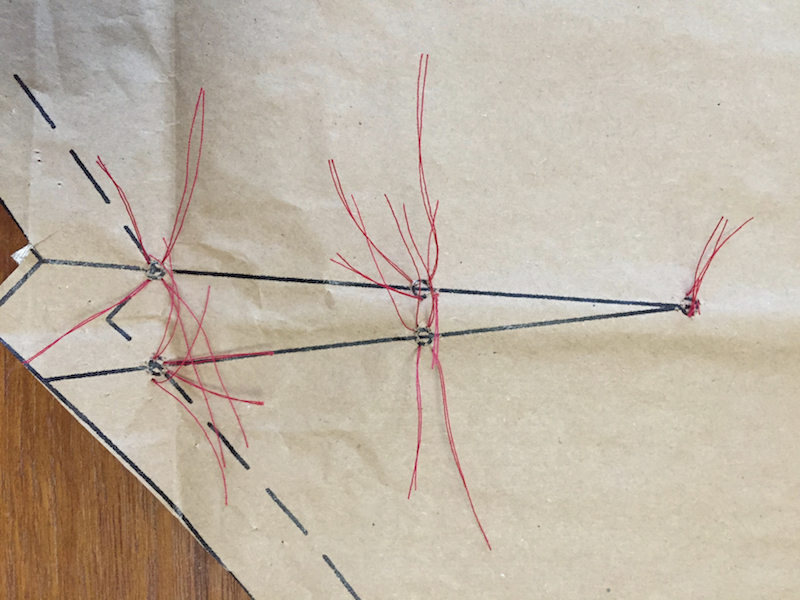
 Dart marking brought together and pinned in place.
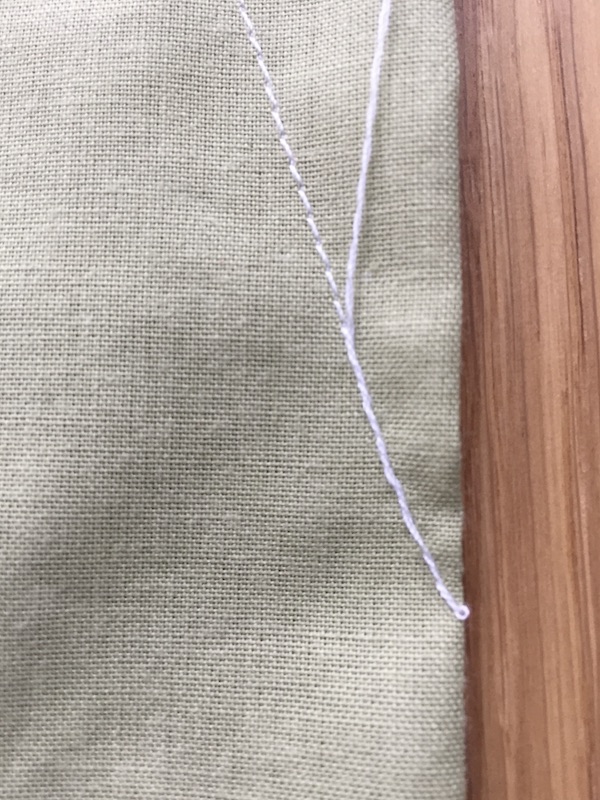
The dart is sewing from seam edge to dot " C ".
The machine stitching will go through dot " A " and dot " B " gradually getting closer to the edge of the fabric.
Continue sewing through the dots, past dot " C " and off the fabric.
Cut the thread ends fairly long and these can be weaved back through the sewing stitches to secure off if wanted otherwise they are just left long.
Puckering of the dart can occur if the threads are finished off by back stitching.
Sewing darts in the body of the garment.
The steps are very similar to the side dart. The dots showing the position of the back dart needs to be highlighted onto the fabric by tailor tack threads or tailor chalk.
This will then show where the dart has to be sewn when the paper pattern has been removed. On the back dart shown above this will be A (x1), B (x2) and C (x1).
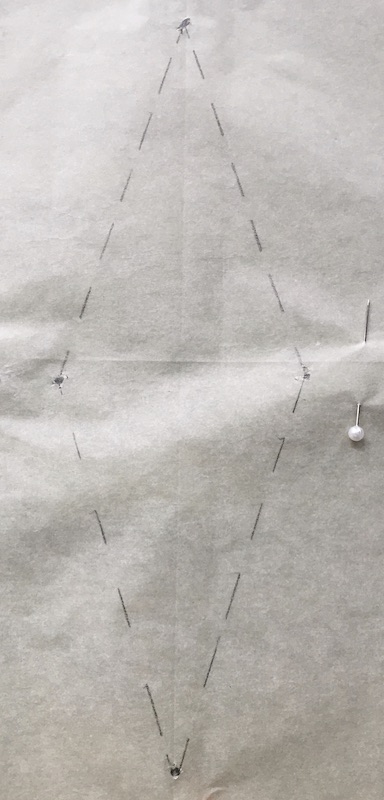 Paper pattern on fabric
 Tailor tacks showing the dots on the back dart.
The paper pattern will indicate where the darts in the back of the garment have to be placed. Following the grain line shown on the pattern place and pin it onto the fabric.
The next step is to highlight all the large and small dots as this shows where all the seam allowance and any extras are to be sewn.
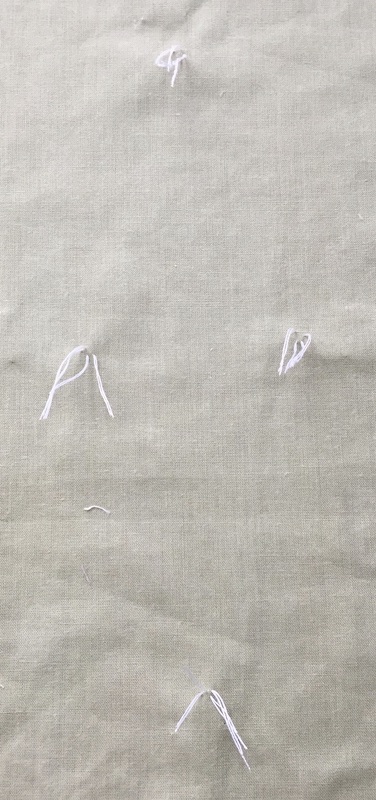
When the paper pattern has been removed this is what the area for the back dart will look like or similar to depending how long the dart is.

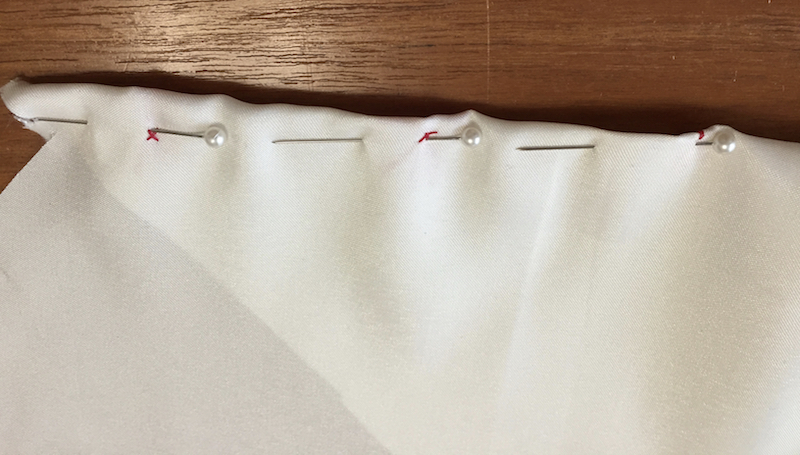
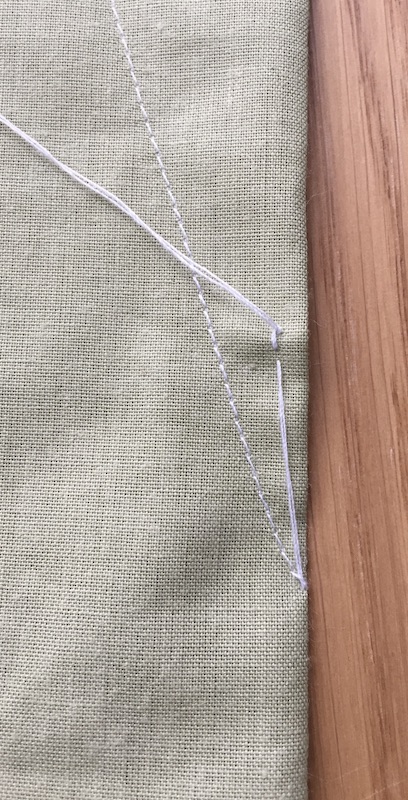
During the making of the garment the dart will need to be pinned in place before sewing.
The B markings are matched and pinned together with markings A and C right on the top of the fold of the fabric.
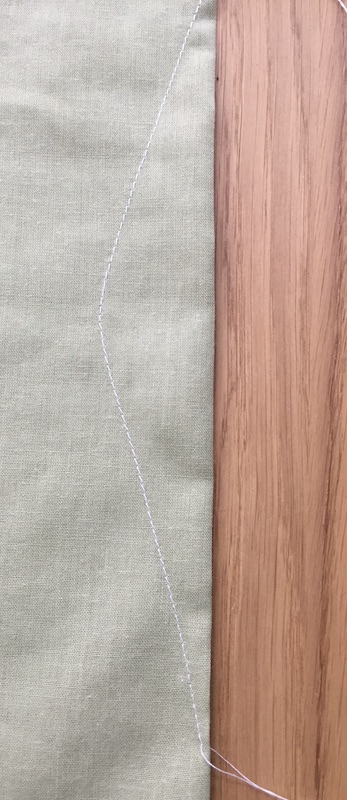
The next step is to sew the dart. The pattern should indicate when this is to be done when following the pattern step by step.
The foot of the machine is place at the first dot A (at the top of the picture) then sewn down to dot B and then onto dot C. The threads are not back stitched as this can cause puckering on the right side.
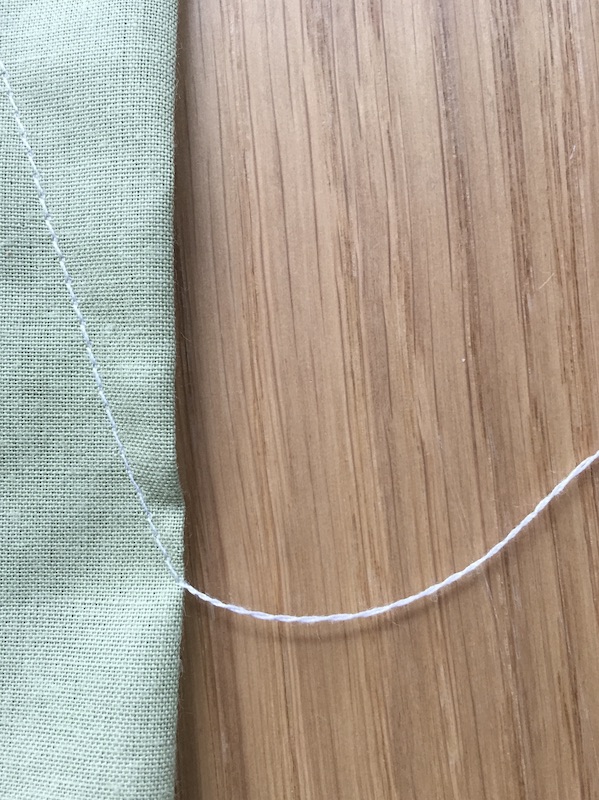
As the dart in sewn and when coming to the end keep sewing off the fabric and this will give a little twist to the thread. These can be left long on the wrong side of the garment or they can be finished off.
Finishing off the dart threads
One way to finish of the dart thread is to weave then in and out of the actual seam stitches a little way and then trim the ends.
Another way to finish of the the dart threads is to secure them into the back fabric part of the dart that will not be seen on the right side. These can be knotted and trimmed.
Dart are there to enhance a garment by it a better fit for the person wearing the garment.
Enjoy sewing darts..
Affiliate offers
Please take care with any soft furnishing that it does not come into contact with any heat source.
If you have found an error on this page or want some more information on sewing cushions.
Please contact me . Thank you