How to Make Curtains
Ever wondered how to make curtains but didn't know where to start? A lot of people would be put off just at the thought of it, but it is quite straightforward and basically straight sewing but a lot of it.
The one part that is a little overwhelming is the amount of fabric some curtains take. Making curtains for a small window will be easier than making curtains for a patio door window.
The amount of the fabric widths and the length can seem very daunting but it can be done. Take the furniture out of a dining room and use the floor if it is easier. I have done this many times after cleaning the floor of course.
How to make curtains - First steps before sewing.
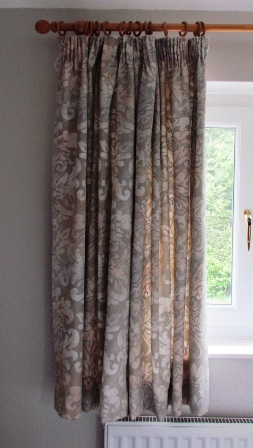
There are a few steps that need to be addressed beforehand such as what style of heading either eyelet, pencil pleat, or tab top.
The type of track or pole to be used. Make sure the window has been measured, the amount of fabric calculated and whether a lining is to be added.
All these questions depend on the amount of fabric you will need.
Choosing the Fabric
Decide on the curtain heading
Lined or Unlined Curtains
Steps to how to make curtains
Cutting the fabric
The material or fabric can be ironed beforehand if necessary to give a smooth surface.
Lay the fabric wrong side up and measure the cut length ( that is the finished length as well as the extra material for the heading and hem) of the fabric.
The curtains lengths can be sewn together, vertically with a seam, before the heading is sewn in place.
Sewing widths together
 Seams sewn selvedge to selvedge.
If the window is wider than the width of the fabric sew the cut lengths together selvedge to selvedge in order to get the width needed for each curtain either 2 widths or 1 + 1/2 widths.
If the material is much wider than the window then possible only 1 width will be needed.
Press the seam.
Turning in the side seams
 Side seam turned in and sewn
Measure the side seams to the chosen width, pin and press.
Turn the raw edges to the inside and sew along the turned hem.
This would be the stage in lined or unlined curtains, depending if the linings were to be left hanging separately from the curtains and not joined to the side seam.
Turning up the hem
 Turn hem to correct height, pin and sew.
Turn the raw edges of the hem under, press and turn up hem to the required length and either machine or hand stitch in place.
For full length curtains that touch the floor any machine sewing will not really be noticed.
The curtain at this stage should now have the side seams and hem turned and sewn.
If these are to be lined, use the above steps with the lining fabric making sure the sides and hem is shorter than the curtain so it does not show on the right side.
This just leaves the heading which will be different for pencil pleat, eyelet or tab top curtains.
Adding the lining
The same amount of different fabric will be calculated for the linings as well as the curtains. This is to ensure that the curtains open and close properly without the lining hindering or being too tight.
Turn the side and lower hems making sure the lining is shorter and narrower than the curtain.
This should prevent the lining showing when the curtain is hanging, but if the lining does tend to show then a little slip stitch could be made to hold it in place.

Another way to add the lining is to sew the top and side seams together.
When turned out to the right side because the lining is narrower than the curtain it will pull the curtain fabric to the inside showing a narrow edge of fabric.
Adding the headings
 Pencil Pleat Heading Tape
After the curtains have been sewn together the heading tape can be sewn on. Ready made heading tape is used for all types of pleated curtains as this has the slots to insert the appropriate hooks for the type of heading required.
For pencil pleat curtains measure the length of the tape along the top of the curtain and allow a little extra to turn in to hide the raw edges.
Turn down the top of the curtain to catch in the lining and then pin the heading tape on it leaving a small gap at the top so the tape isn't seen on the right side.
 Eyelet headings
Eyelet curtain heading can be used on lined and unlined fabric. This type of curtain heading usually uses one and a half width and there needs to be an even amount of eyelets to get the folding correct. The correct folding is where the seams face the window and not out into the room.
Eyelet heading tape can also be bought ready made and then sewn in place but if a medium weight to heavy weight fabric was used then the fabric itself would give the heading the strength and individual rings could be used instead. Once attached to the fabric a covering ring is placed over the top for both ways.
 Tab top curtain heading
Tab top curtains do not have a ready made tape, for the tabs and top facing extra fabric needs to be added to the fabric calculation after deciding on how many tabs and how wide they will be.
Make the tabs by sewing the sides together, iron flat with the seam at the back and then inserting the edges between the top of the curtain and the curtain facing or lining if one is going to be used.
Press facing to the wrong side of the fabric allowing the tabs to be at the top of the curtain. The bottom edge of the facing can be slip stitched in place or machine stitch if wanted. In the ones shown in the picture the top seam of the facing was top stitched for extra strength and the side seams were also machine stitched closed.
There are many outlets for fabric both on the high street and the many online sites.
Enjoy learning how to make curtains.
- Home
- All About Sewing
- How to make curtains
Affiliate offers
Please take care with any soft furnishing that it does not come into contact with any heat source.
If you have found an error on this page or want some more information on sewing cushions.
Please contact me . Thank you