Sewing Clothes
Many years ago the job of sewing clothes would be given to seamstresses and tailors who would sew these items by hand with patterns made from scratch.
This would take a long time and people would not have had a large choice of outfits. They would be lucky if they had an everyday set of clothes and a set of clothes for best.
The Victorian era and the invention of the Sewing Machine changed all that as the making of clothes could be done much quicker and the machine could be used in the home therefore reducing the cost of new clothes.
The beginning of sewing clothes for me started as a necessity as I was 5'10" in the 1970's before tall ranges in the shops were available.
I had a few disasters when learning sewing at school but in the end the basics of sewing were mastered.
I either had to wear short sleeved blouses and skirts that didn't really fit properly or even worse trousers that flapped around the ankles. The maxi skirts that arrived at that time were great and sewing a simple long skirt didn't take very long.
Another fashion back then was smock dresses and these took a huge amount of fabric but as I found out later these could be cut down to make clothes for children.
I am a great believer in reusing or remaking with pre-used fabric and handicrafts that can use this technique are patchwork and appliqué.
Recycling or remaking clothes also became a necessity in the war years when fabric and clothes were in extremely short supply. Larger sized clothes were remade smaller for the children.Clothes could even be made from sheets and curtains as these still could be done today, no one would know unless they had the same pattern hanging at their windows.
Steps in Sewing Clothes
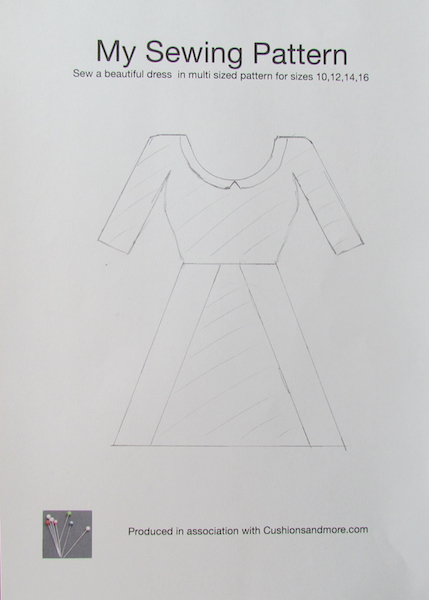
Choosing the pattern, fabric and sewing notions.
Decide what you are going to make, if this is your first attempt then try to keep it simple. Find a sewing pattern to suit your decision and on the back of this will be some fabric suggestions and how much will be needed to make the garment depending on the width of the fabric.
The sewing notions are things like thread, buttons, zips and possibly interfacing that will help to complete the garment.
All the pattern pieces will then have to be cut out from the tissue paper inside the pattern pack.
At this stage it is important to check the fitting of the pieces against the person as there are areas that can be lengthened (by adding some paper into the pattern) or shortened (by folding the pattern) if necessary.
The clothes pattern will actually give you step by step instructions and pictures. If the pattern has a more than one item of clothing then these will have numbers or letters on them. This could let you know that numbers 1-5 will be needed for the dress for example so you will need to get all the right pattern pieces ready.
Placing the pattern pieces on the fabric
The fabric is usually placed right sides together with the selvedges meeting at one side and the fold at the other.
Again the pattern will show the most economic way of placing the pattern onto the fabric so not to waste fabric. It will also say whether to place the particular pieces against the fold to make a larger piece like the front. This is usually done by an arrow.
Another arrow on the pattern is to make sure that the pattern is placed on the straight grain of the fabric. This is will be the less stretchy part of the fabric and will ensure that the garment fits well.
When all the pieces are placed onto the fabric they are then pinned through both sides of the fabric and held in place.
These are then cut out along the solid dark line making sure to cut a "V" shape away from the notches shown along the way.
 On a multi sized pattern you can trace over the size needed. Remember to include some points to line up with later such as size dots or waistline.
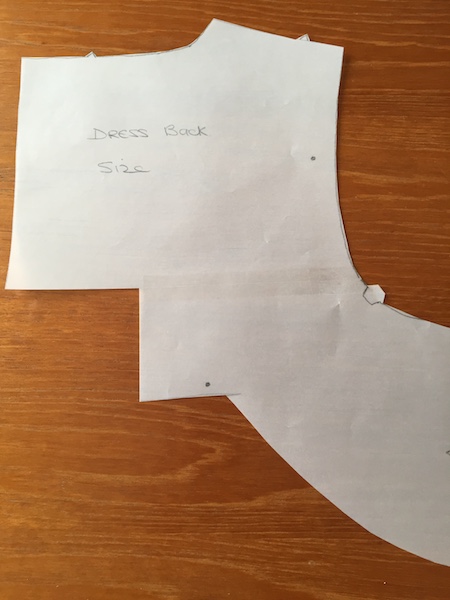 This pattern shows the right size needed where there are many line sizes. Before cutting out pattern fold back multi sized pattern and place this over matching the points.
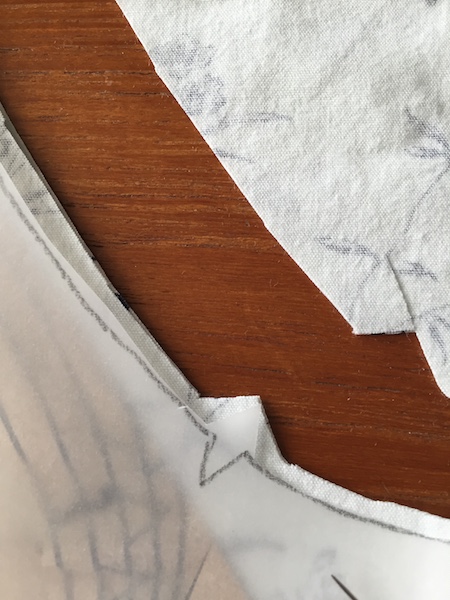 Cut out notches so the "V" is away from the fabric edge.
Marking the dots, darts etc
This part may seem tedious but it is an important part as it makes sure the fit is right.
This is usually done with a strong contrasting coloured thread left in long strands that have been cut and that can be cut between the two pieces. The strong colour helps the dots to be seen as a matching thread would make this harder to see.
When all the dots, darts and other parts, such as placing lines, that you may want highlighted to help you in the sewing is done, remove the pins and carefully take off the tissue paper pattern.
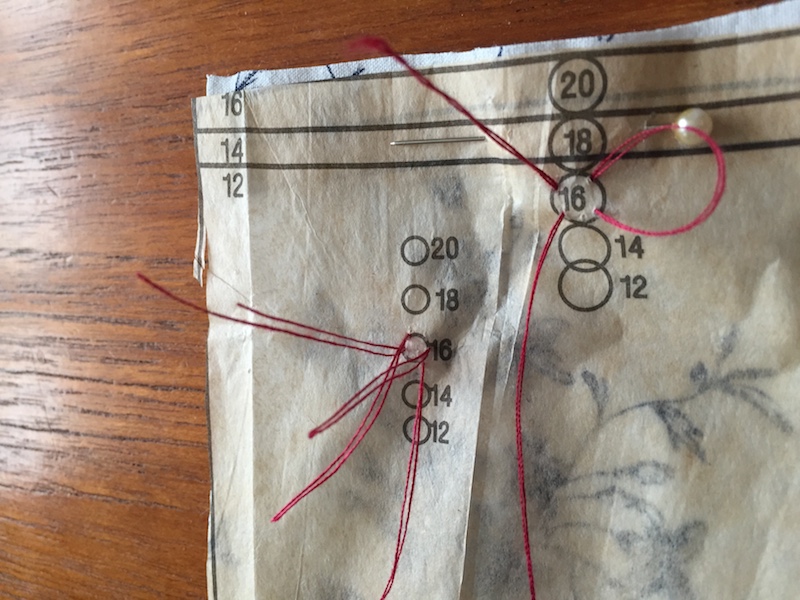 On a multisided pattern make sure you tack the right size as they are all close together.
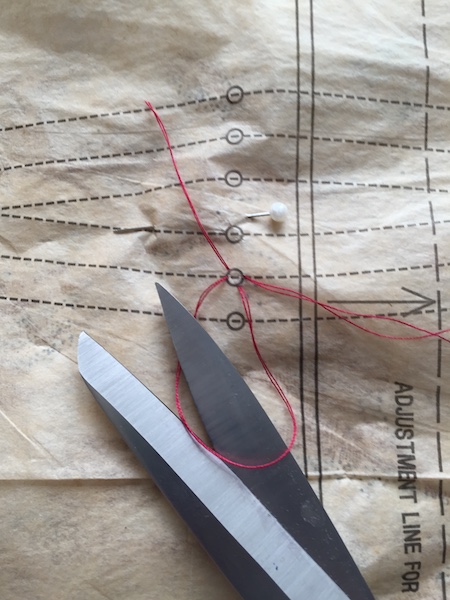 Cut the loops in the marking thread to allow pattern to lift off.
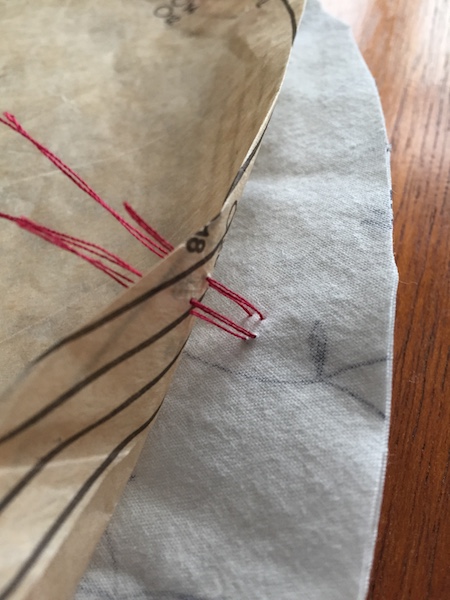 Carefully remove pattern from fabric as threads can be pulled out at this stage.
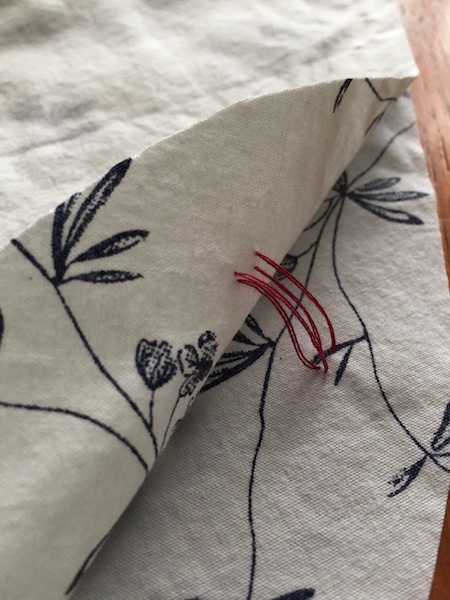 Carefully part the two sides of fabric keeping the marking thread on both sides.
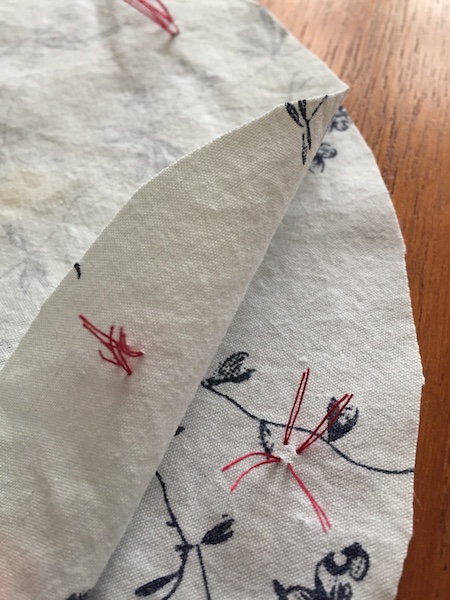 Cut marking thread so dot position is marked on both sides of the fabric.
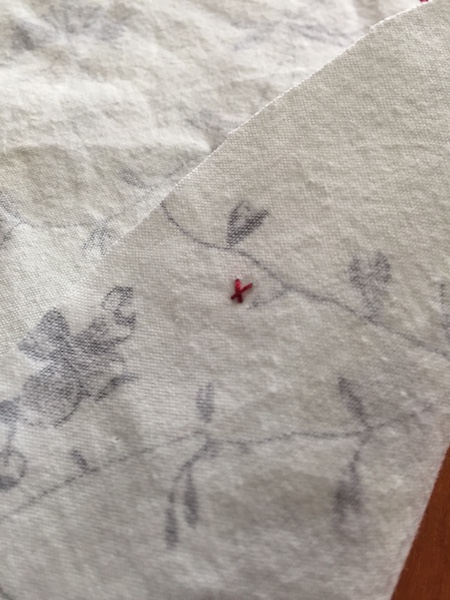 One fabric half will have the loose threads that can be pulled out easily. The other side will have cut threads with a crossed back as shown.
Sewing Clothes pieces together
Following the steps on the pattern sew the pieces of fabric together until the garment is complete. It is a good idea to keep trying on the garment if possible as the steps are completed. Some finer fitting can be done at this stage to make sure of a good fit.
The following topics will be covered in more detail:
Sewing Clothes and How To.....
How to sew a dress
How to sew a sleeve
How to sew a skirt
How to sew a zipper
Enjoy sewing clothes for yourself and others.
Affiliate offers
Please take care with any soft furnishing that it does not come into contact with any heat source.
If you have found an error on this page or want some more information on sewing cushions.
Please contact me . Thank you