Making Simple Cushions
instructions on sewing a basic cushion
In this section, making simple cushions, I am going to give a step by step guide to making a basic or simple cushion. Other types of cushion designs are variations of this design.
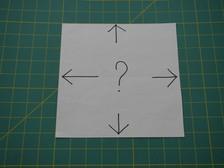
Decide how large your cushion is going to be and make a paper pattern, make sure you allow an extra 1.5cms or 5/8 inch for a seam allowance.
Place the fabric right sides together and pin the pattern on the fabric leaving a gap for the fastening. If the fabric has a pattern make sure it is running straight or use two separate pieces of fabric to match up the stripes or pattern.
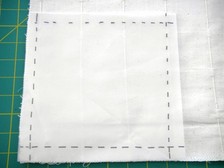
Cut around the pattern piece using large sharp scissors. Remove pattern and then pin or hand tack along the seam edge (1.5cms or 5/8 inch from fabric edge to allow for seam).
Machine sew along the sides of the fabric starting and finishing at either end of the opening for the fastening. Iron the seam allowance on the side where the fastening will go. Trim the corners as this will give a neater finish. Turn cushion right side out. If this cover is going to be a cushion pad then the filling is now placed inside and the opening is hand slip stitched or machine top stitched closed. The pad is now finished or follow the next steps if making a cushion cover. The fastening will now have to be put in depending on what type you have decided to use, the steps below are to insert a zip. It would possibly be easier to sew in Velcro or a strip of poppers before the rest of the cover is made up.
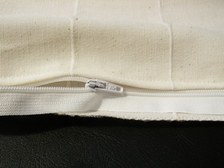
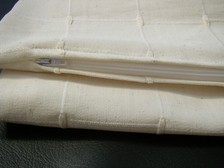
Insert zip by pinning one side of the zip to the opening about 2mm or 1/8 away from the teeth. Machine stitch this in place.
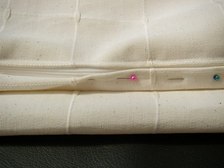
Then place other side of the opening (meeting the one already sewn),covering the zip. Pin in place then open the zip to allow you to machine stitch down other side of the zip to form a flap covering the teeth of the zip.
Some people prefer to put the zip in first as this can be a bit fiddly when all the other seams are sewn. This depends entirely on you. If the zip is to be put in first then sew the opening side of the cushion to the start of the zip then leave a gap or tack closed and continue finishing the seam at the other end after the zip. Press the seam open and then place the zip in the middle of the seam , pin or tack in place. Then machine sew on both sides leaving a small gap by sides of teeth. Remove tacking stitches and continue to sew other sides of cushion.
Press cover seams and place pad inside. If the pad is a little bigger than the cover it will give a fuller look.
Congratulations, you have now managed to make either a cushion pad or a cushion cover. The start of making simple cushions.
Return from Making Simple Cushions to Sewing Instructions
Return from Making simple cushions to How to
Affiliate offers
Please take care with any soft furnishing that it does not come into contact with any heat source.
If you have found an error on this page or want some more information on sewing cushions.
Please contact me . Thank you